Meters
The Meter Management feature enables you to manage meters and track their data over time. This tool provides a comprehensive overview of all meters in a portfolio, their details, and recorded readings.
Overview
The Meter management feature allows users to:
View a list of all meters for selected buildings.
Add, edit, and delete meter details.
Assign meters to buildings.
Access detailed meter data, including meter name, meter type, and subtype, meter data frequency, and metering point number.
Access individual meter readings.
Access Meters
To view and manage meters you have two options :
Option 1:
1. Navigate to the Data management tab.
2. Select the desired buildings.
3. Open the Meters tab under Equipment to see a list of meters for the selected buildings.
Option 2:
1. Navigate to the Data management tab.
2. Open the Meters tab under Equipment, to see a list of meters for the entire portfolio.
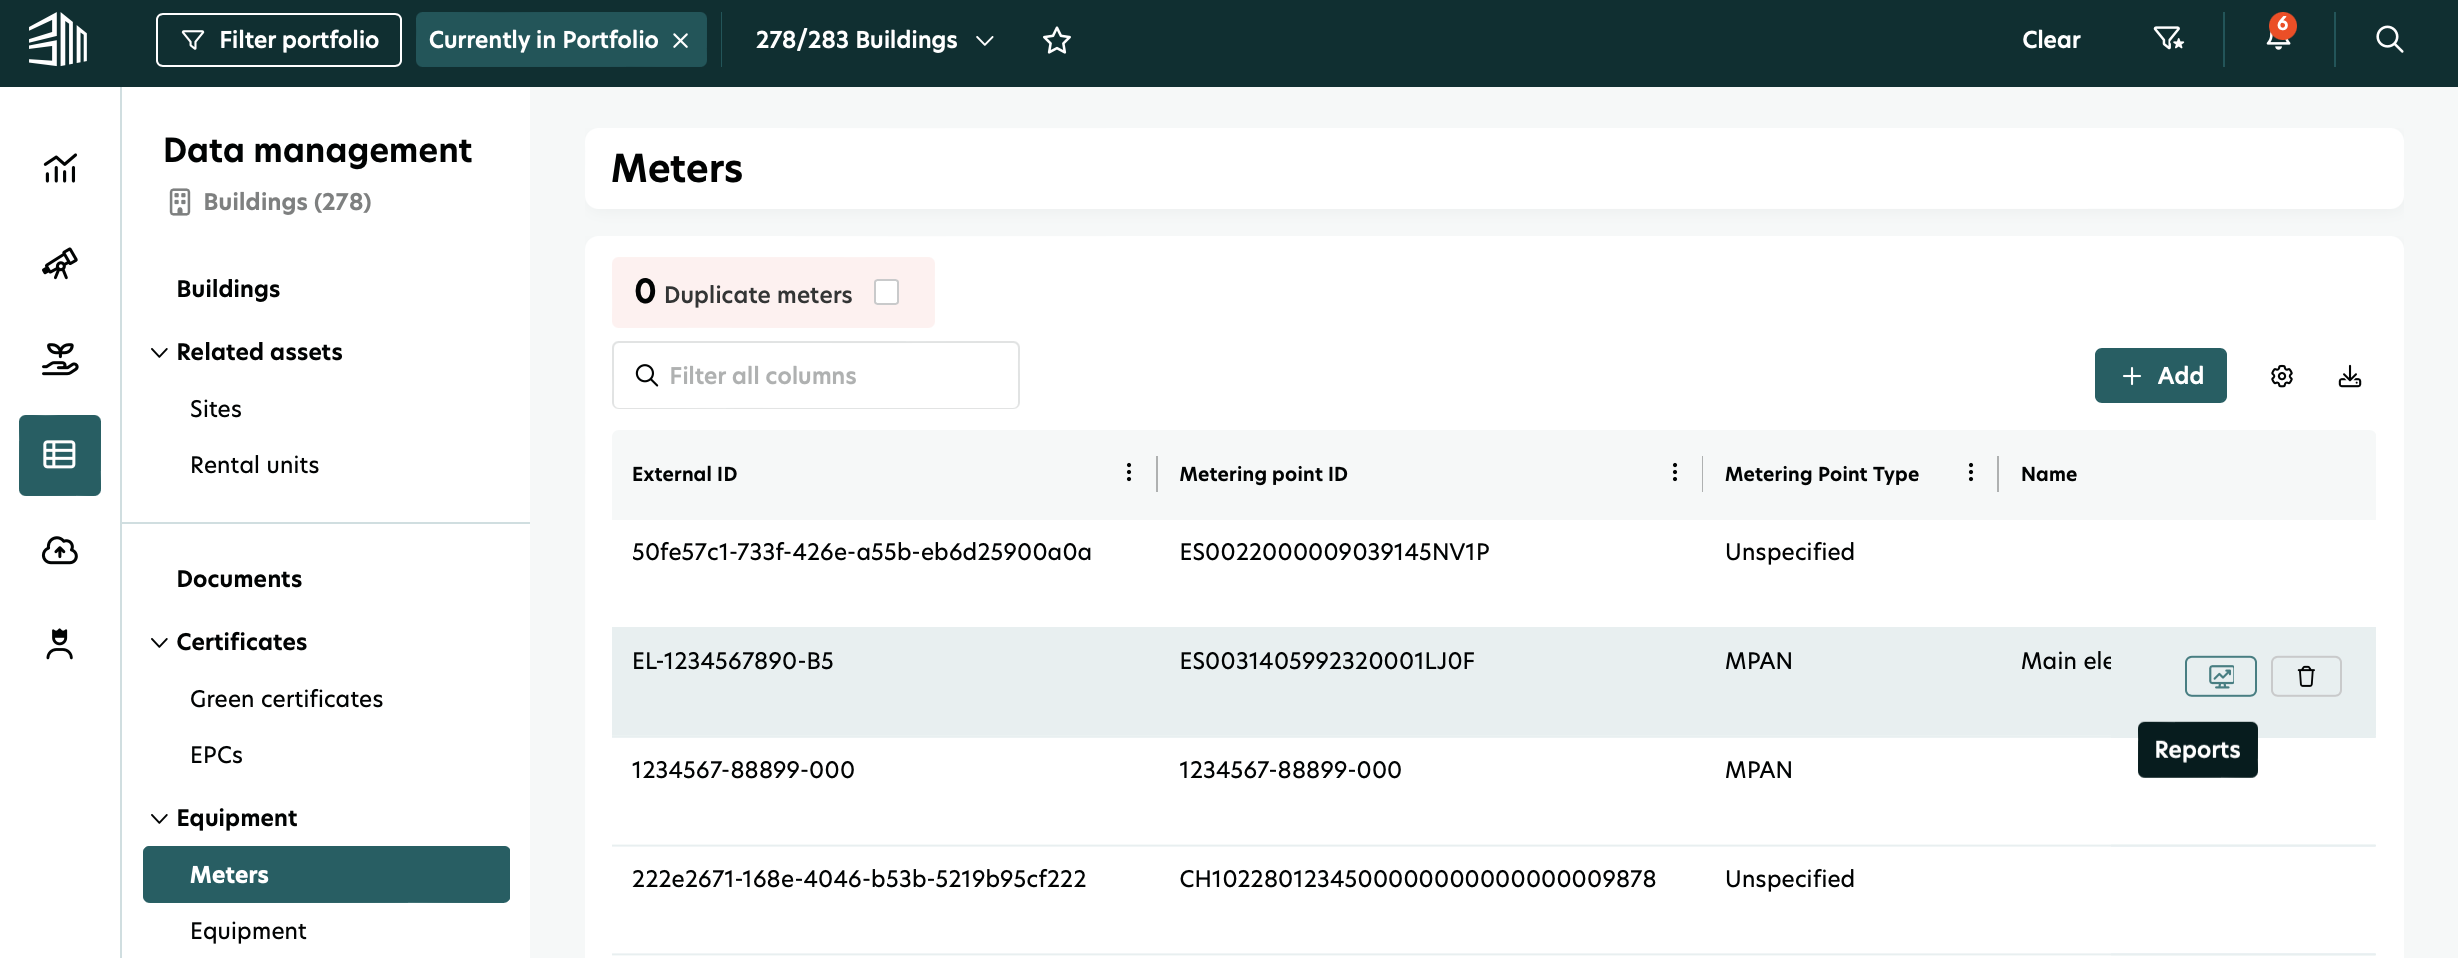
This will display a list of all meters associated with the selected portfolio.
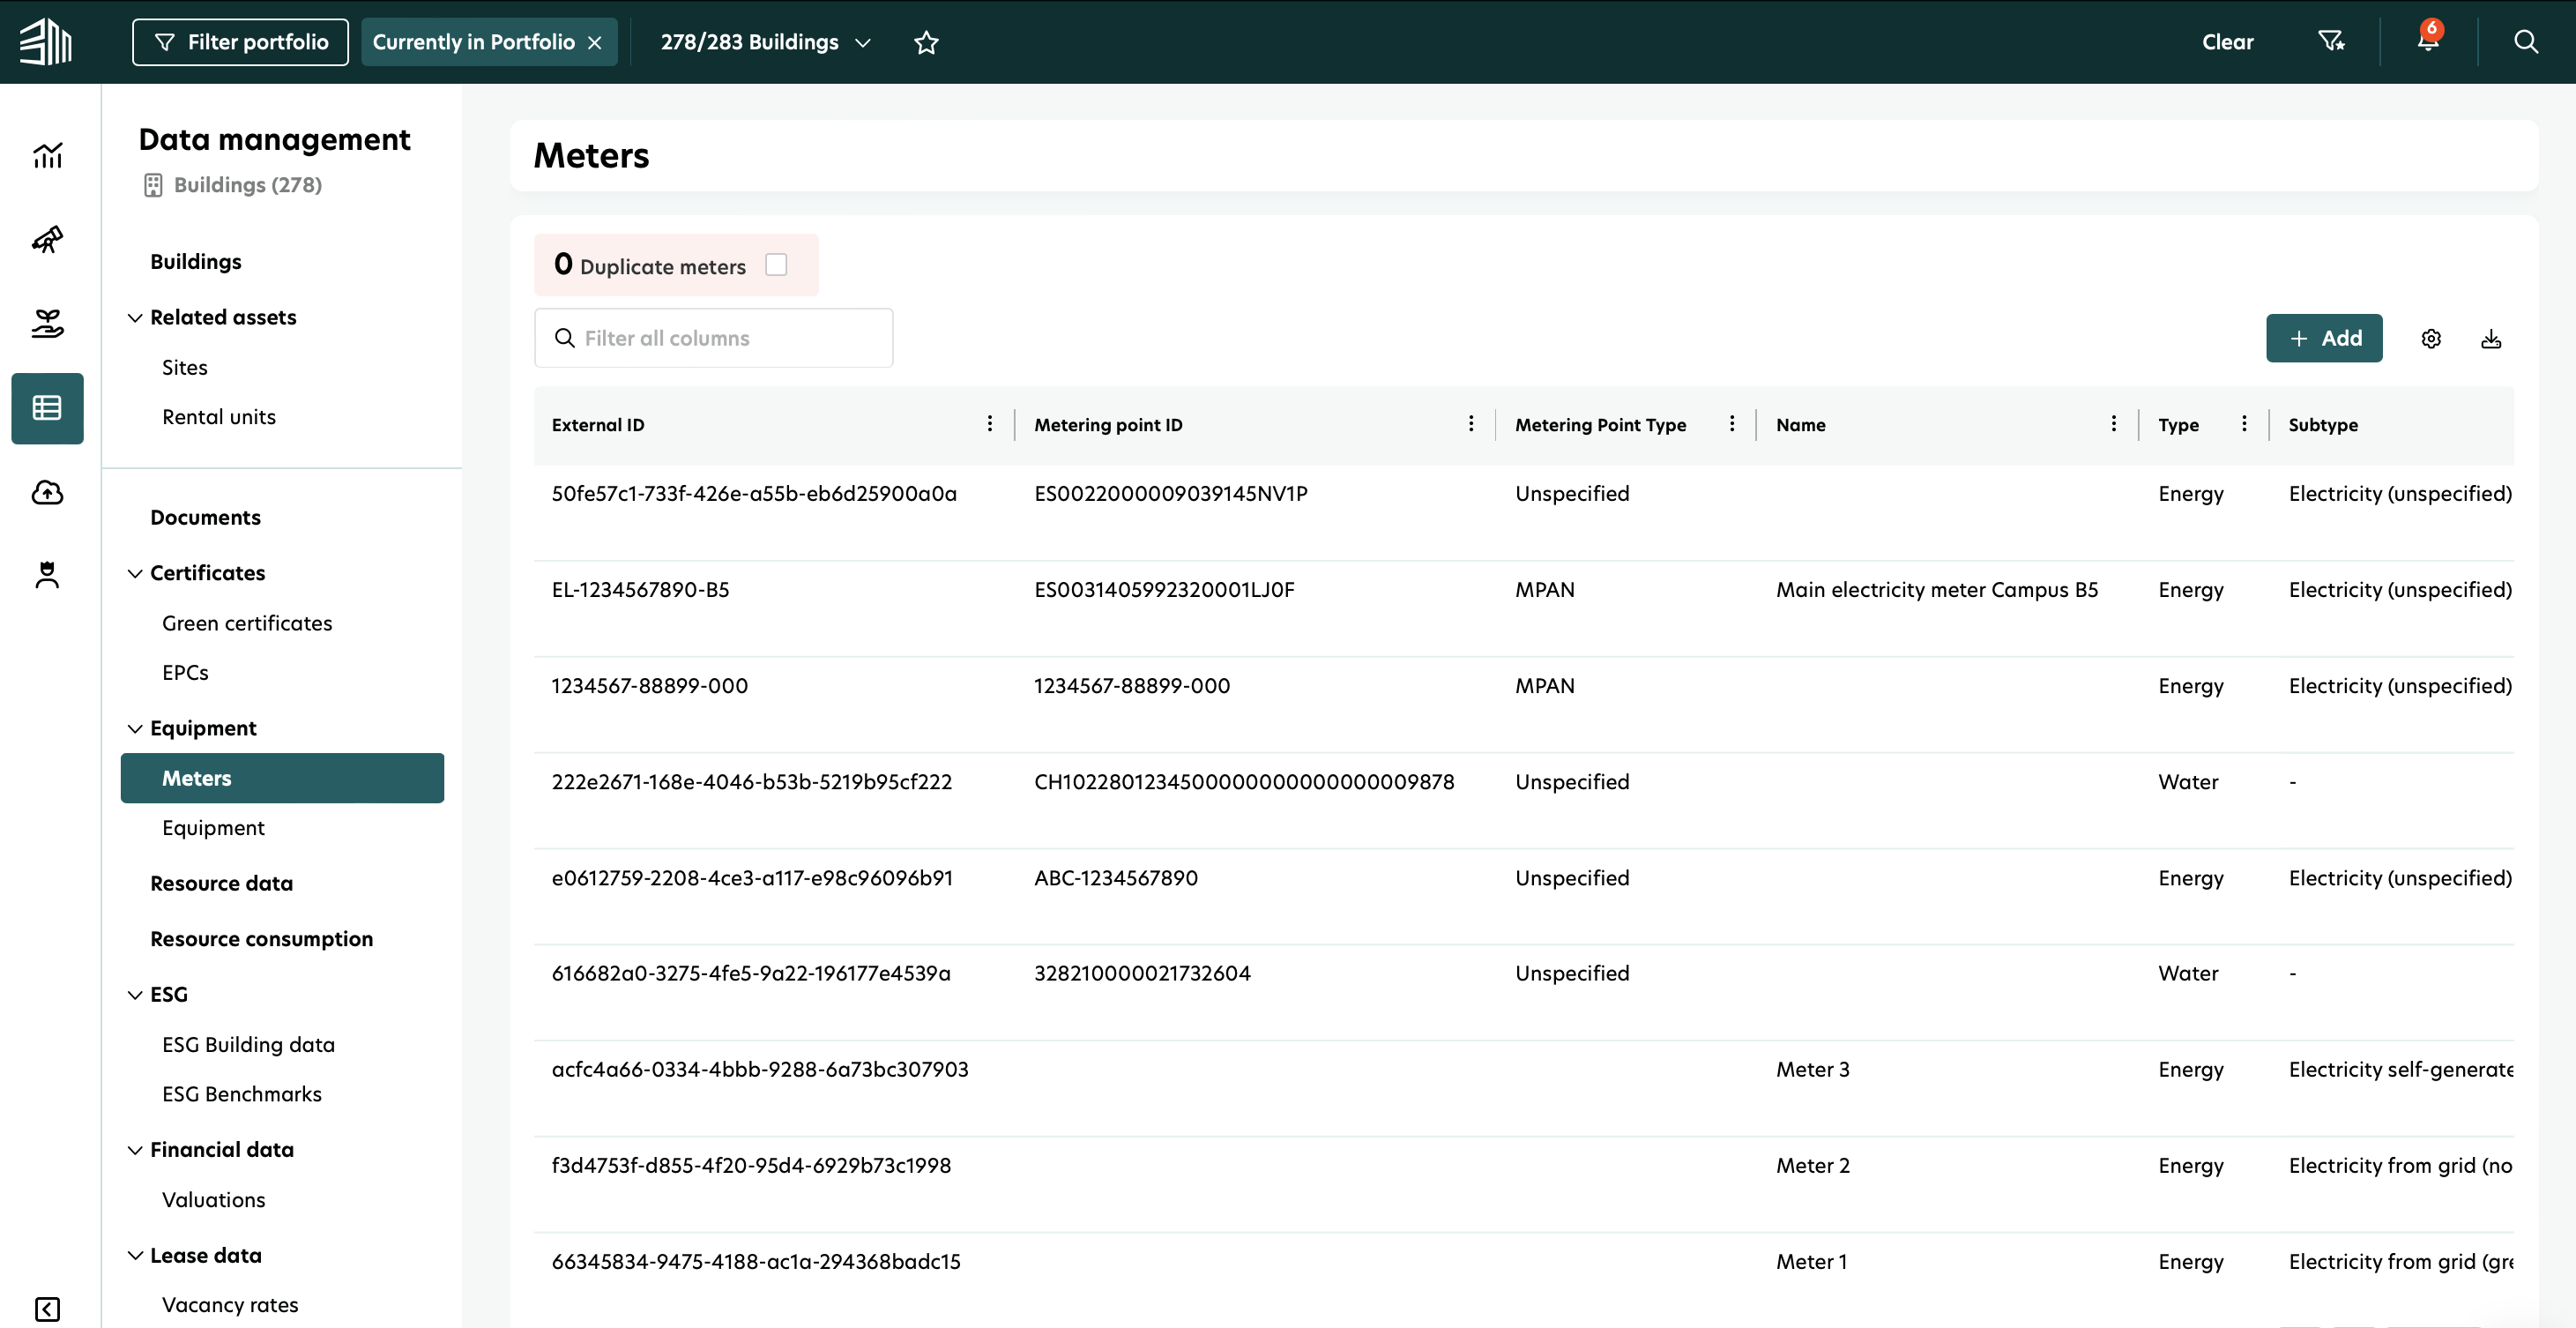
You can sort columns (ascending/descending) or hide/show specific columns by clicking the settings icon. The list updates accordingly.
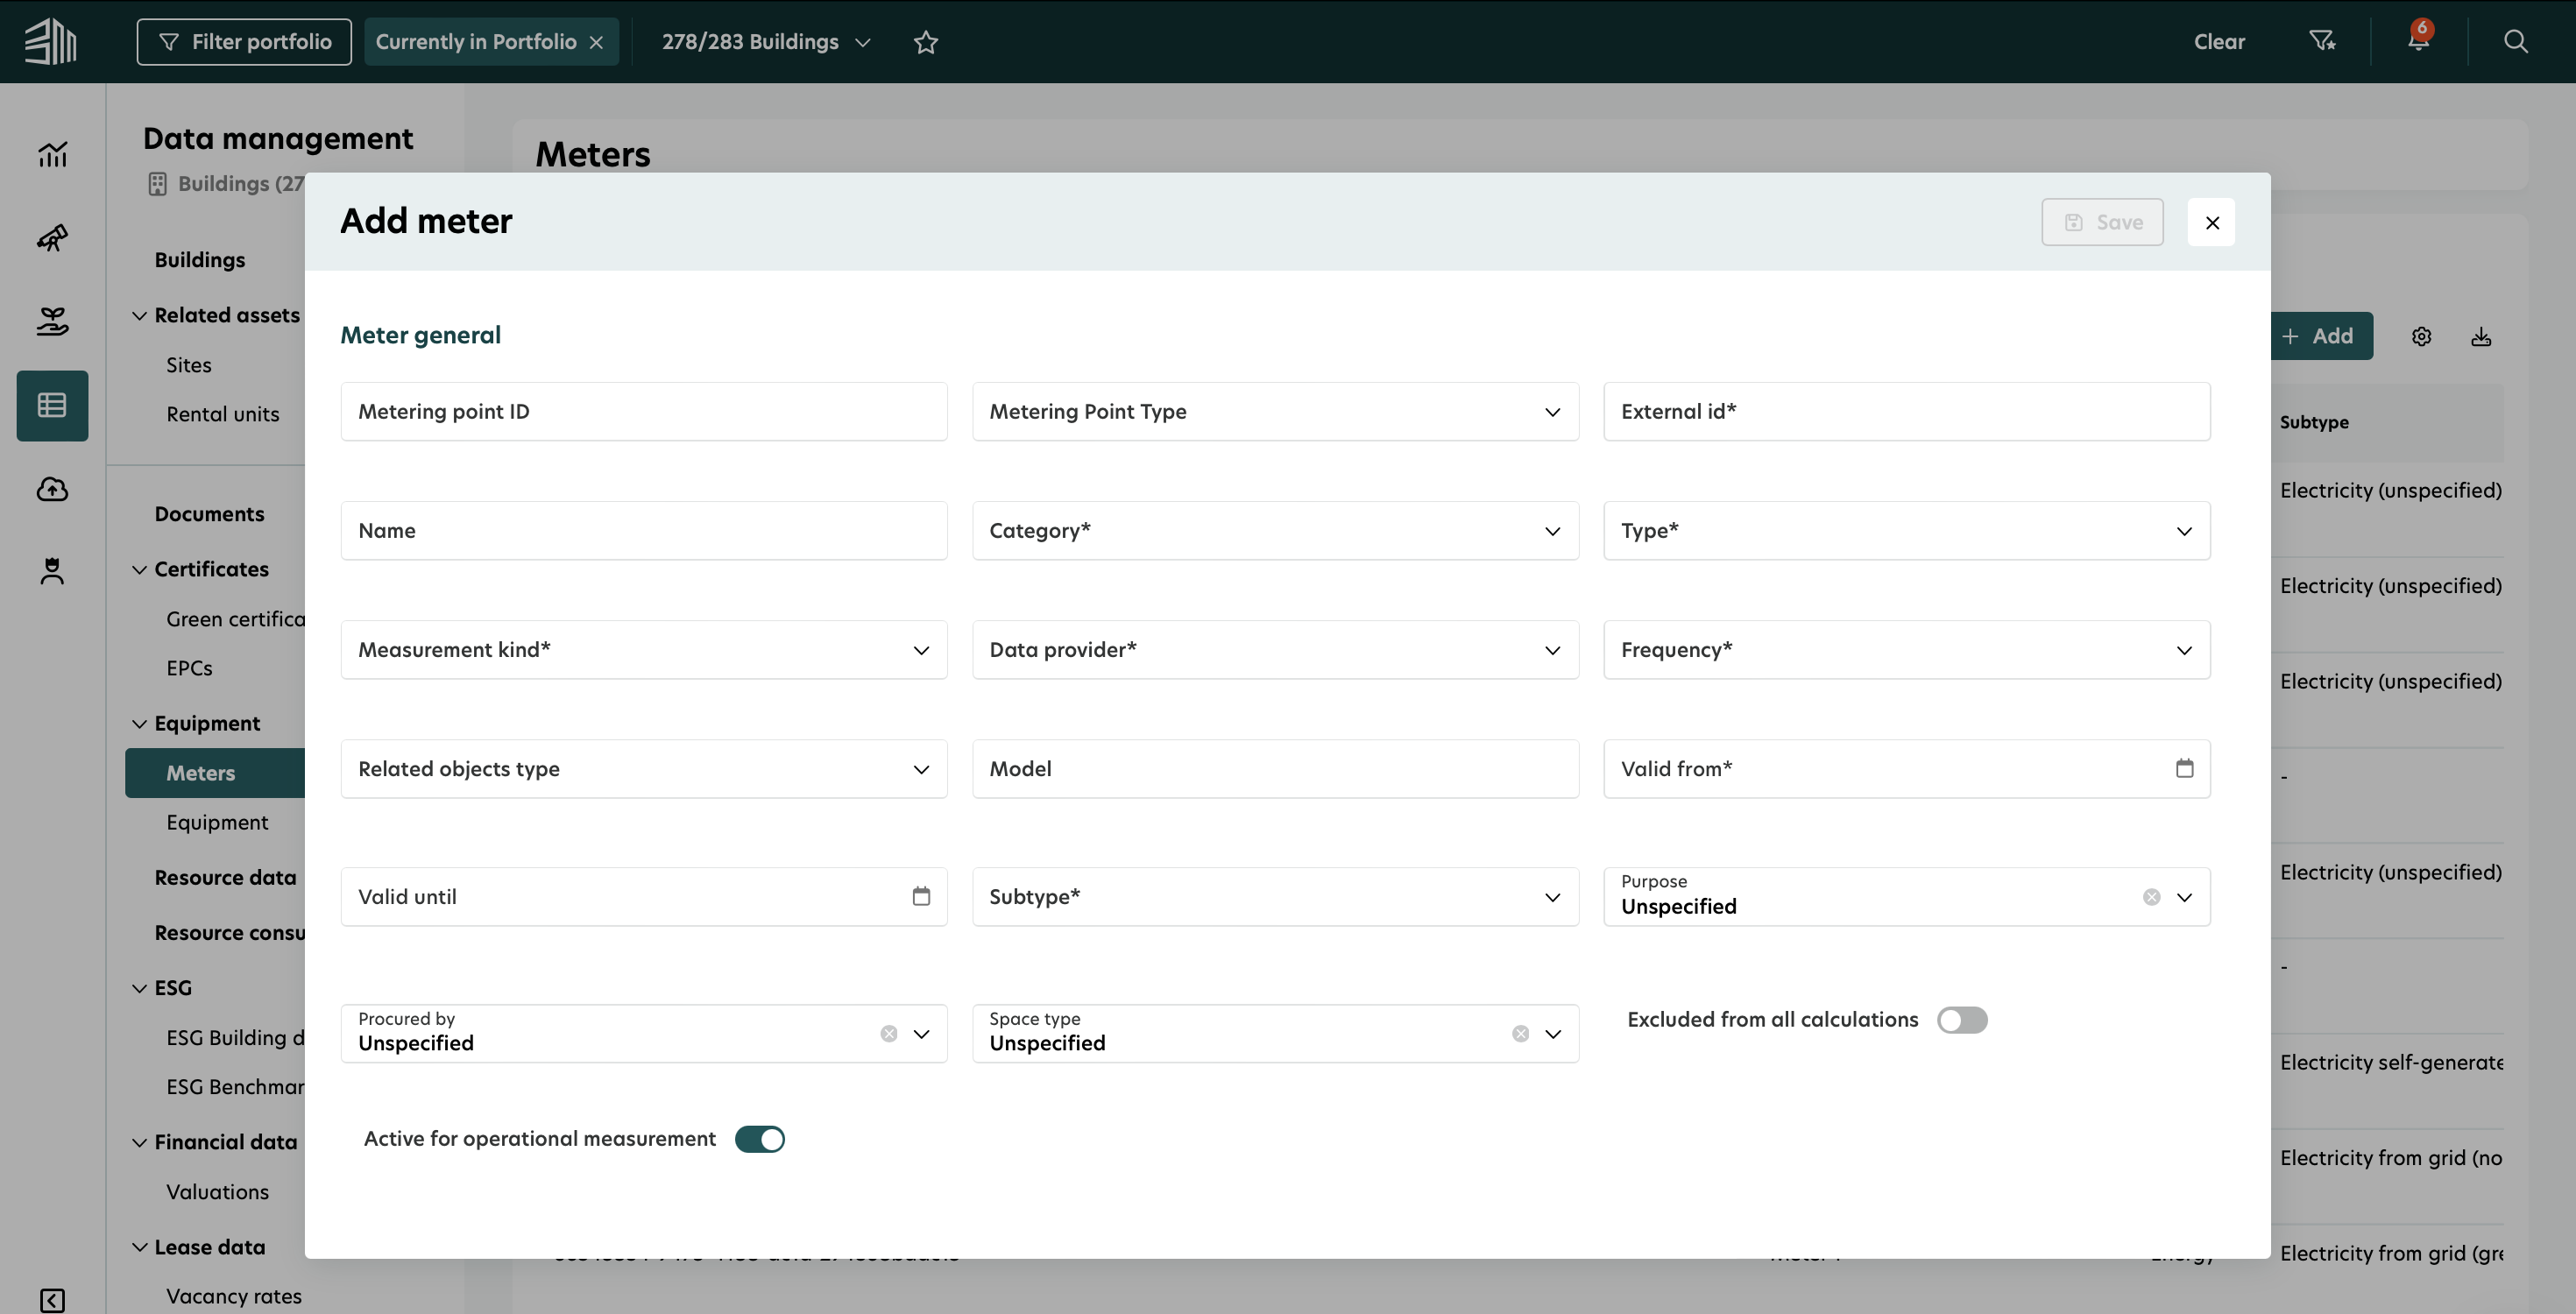
Add a Meter
To add a new meter:
In the Meter section, click + Add.
Fill in the mandatory fields.
Click Save to add the meter to the list.
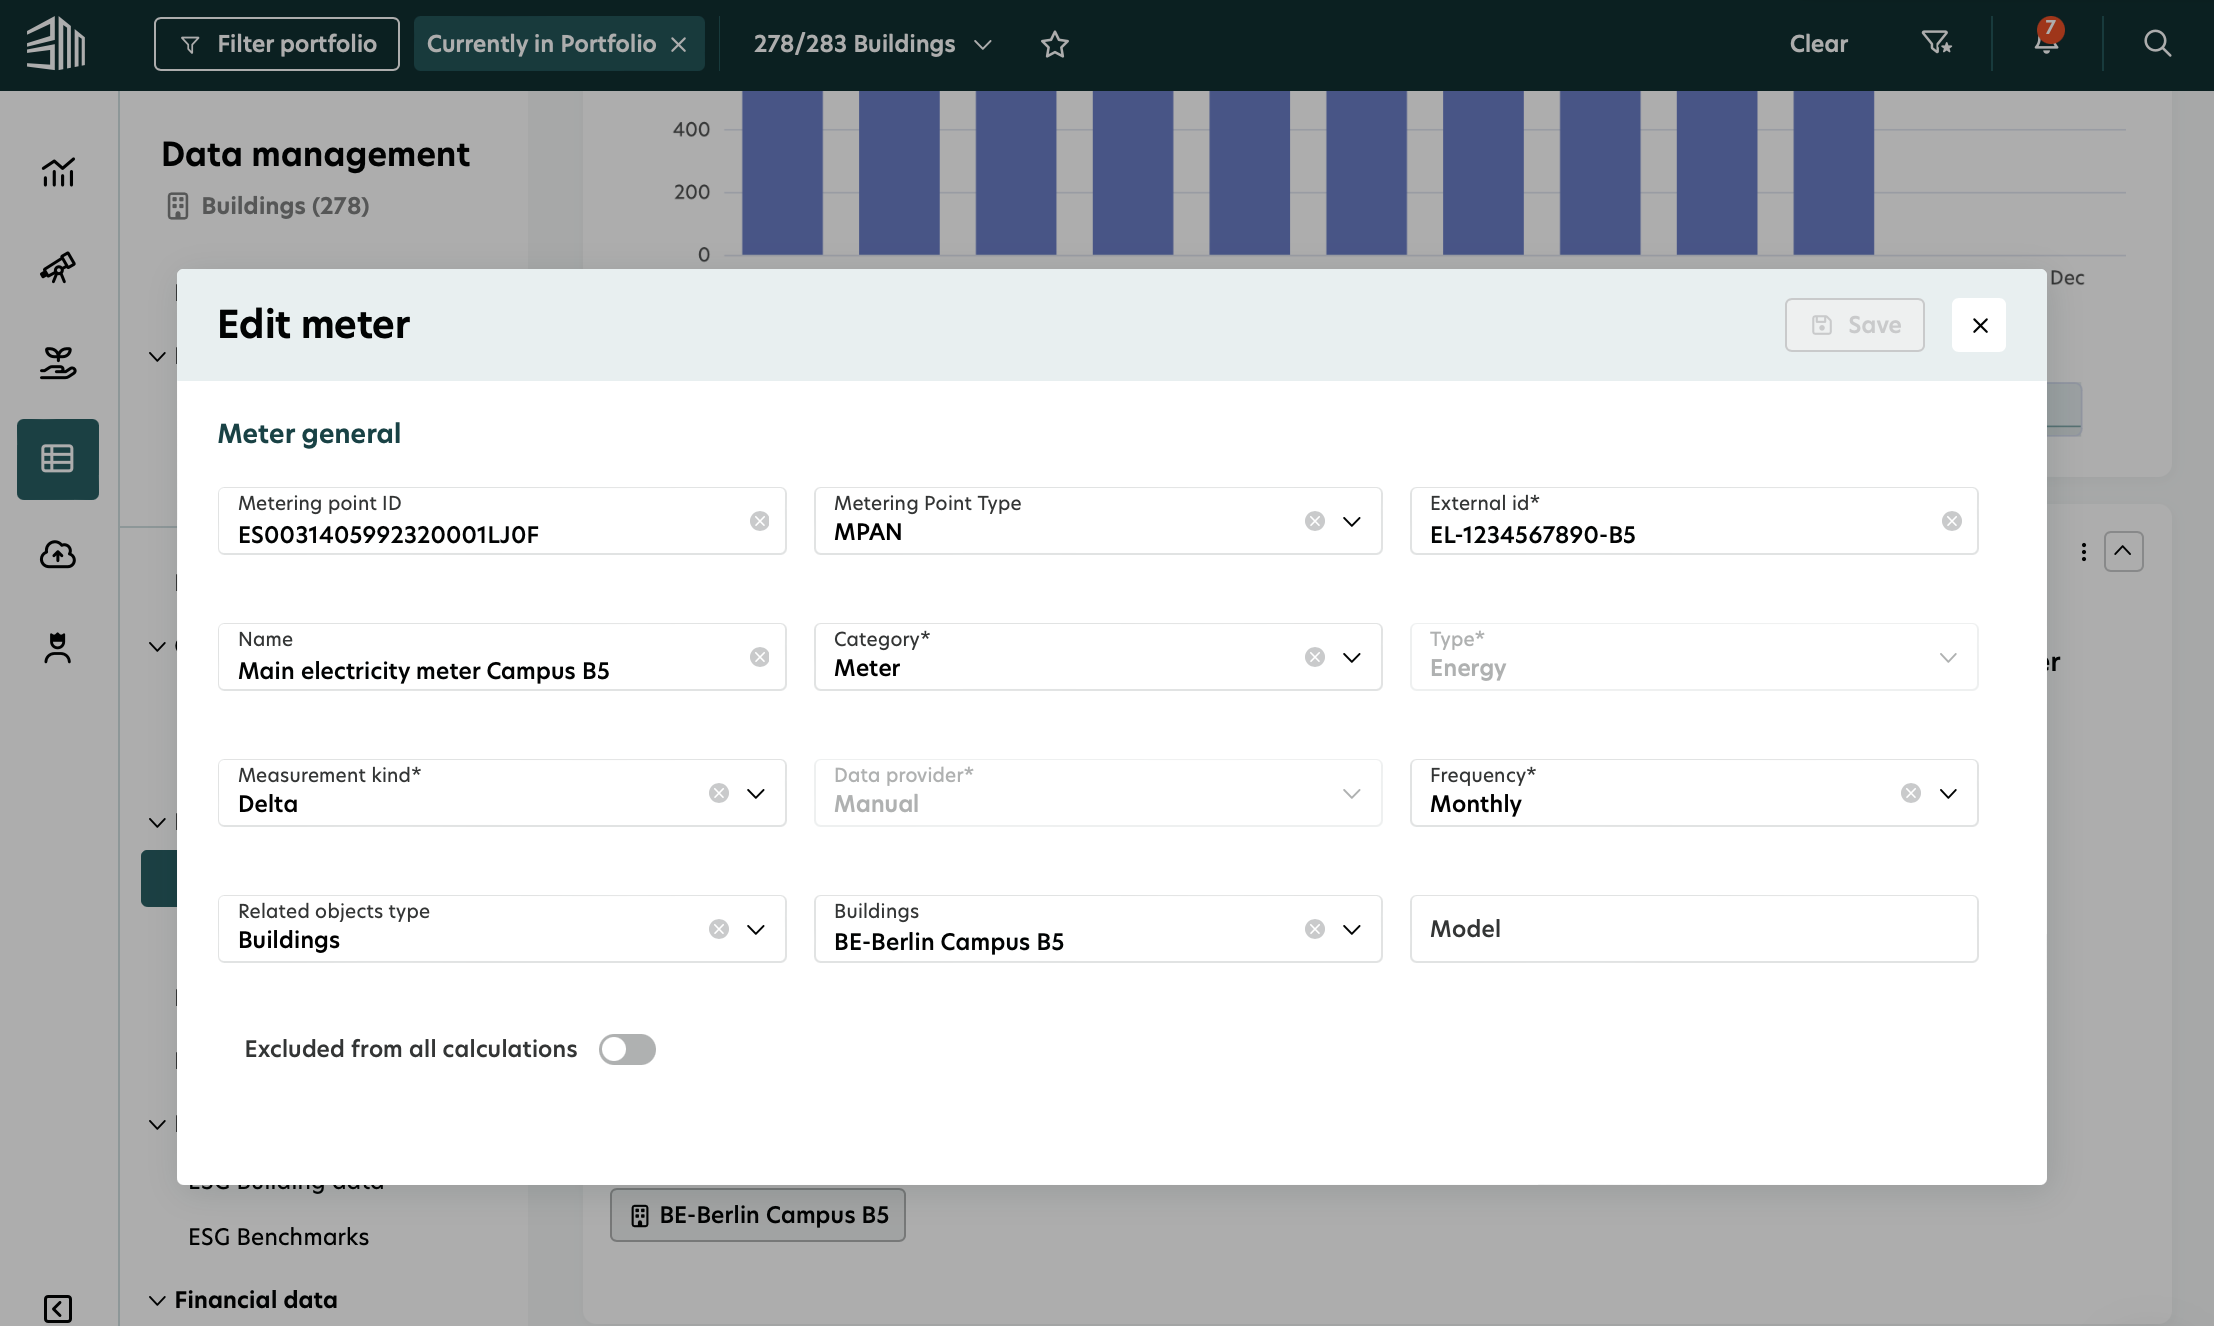
Edit a Meter
To edit the existing meter:
Select the meter from the list.
In the Meter information section click on the three dots and click on Edit.
Update the necessary fields.
Click Save to confirm changes.
You can only edit basic meter information using this method. To update meter context data, you should edit the latest applicable record in the Meter Context (All) section.
View Meter details
The Meter list provides key details for each meter, including:
External ID
Metering point ID and type
Meter name
Meter type and subtype
(if applicable)
Meter data frequency
(e.g., every 15 minutes, hourly, daily, or monthly)
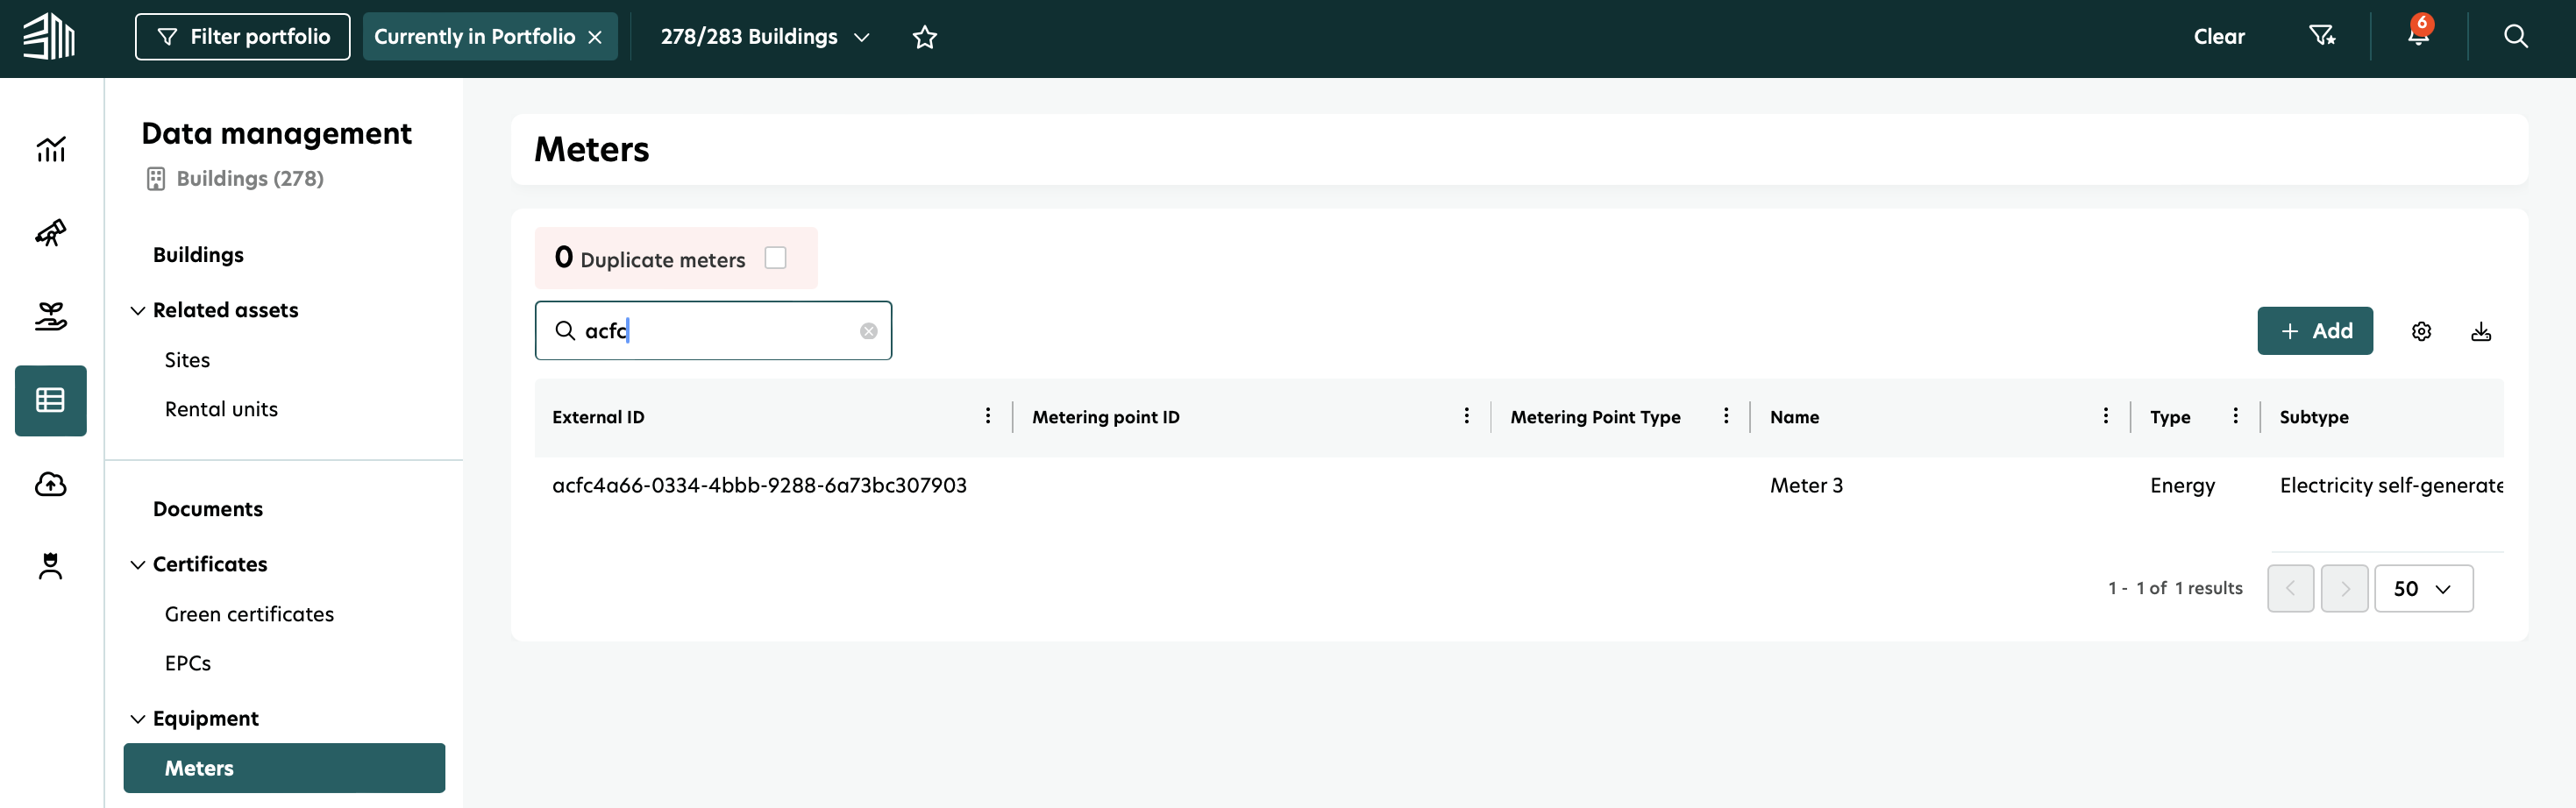
Search for a Meter
To find a specific meter:
Use the Search bar and enter the External ID or Meter name. You can also search by Meter type, Sub-type, Procured by or other attributes of the meter.
View Meter readings
Clicking on a meter opens its details page, which includes:
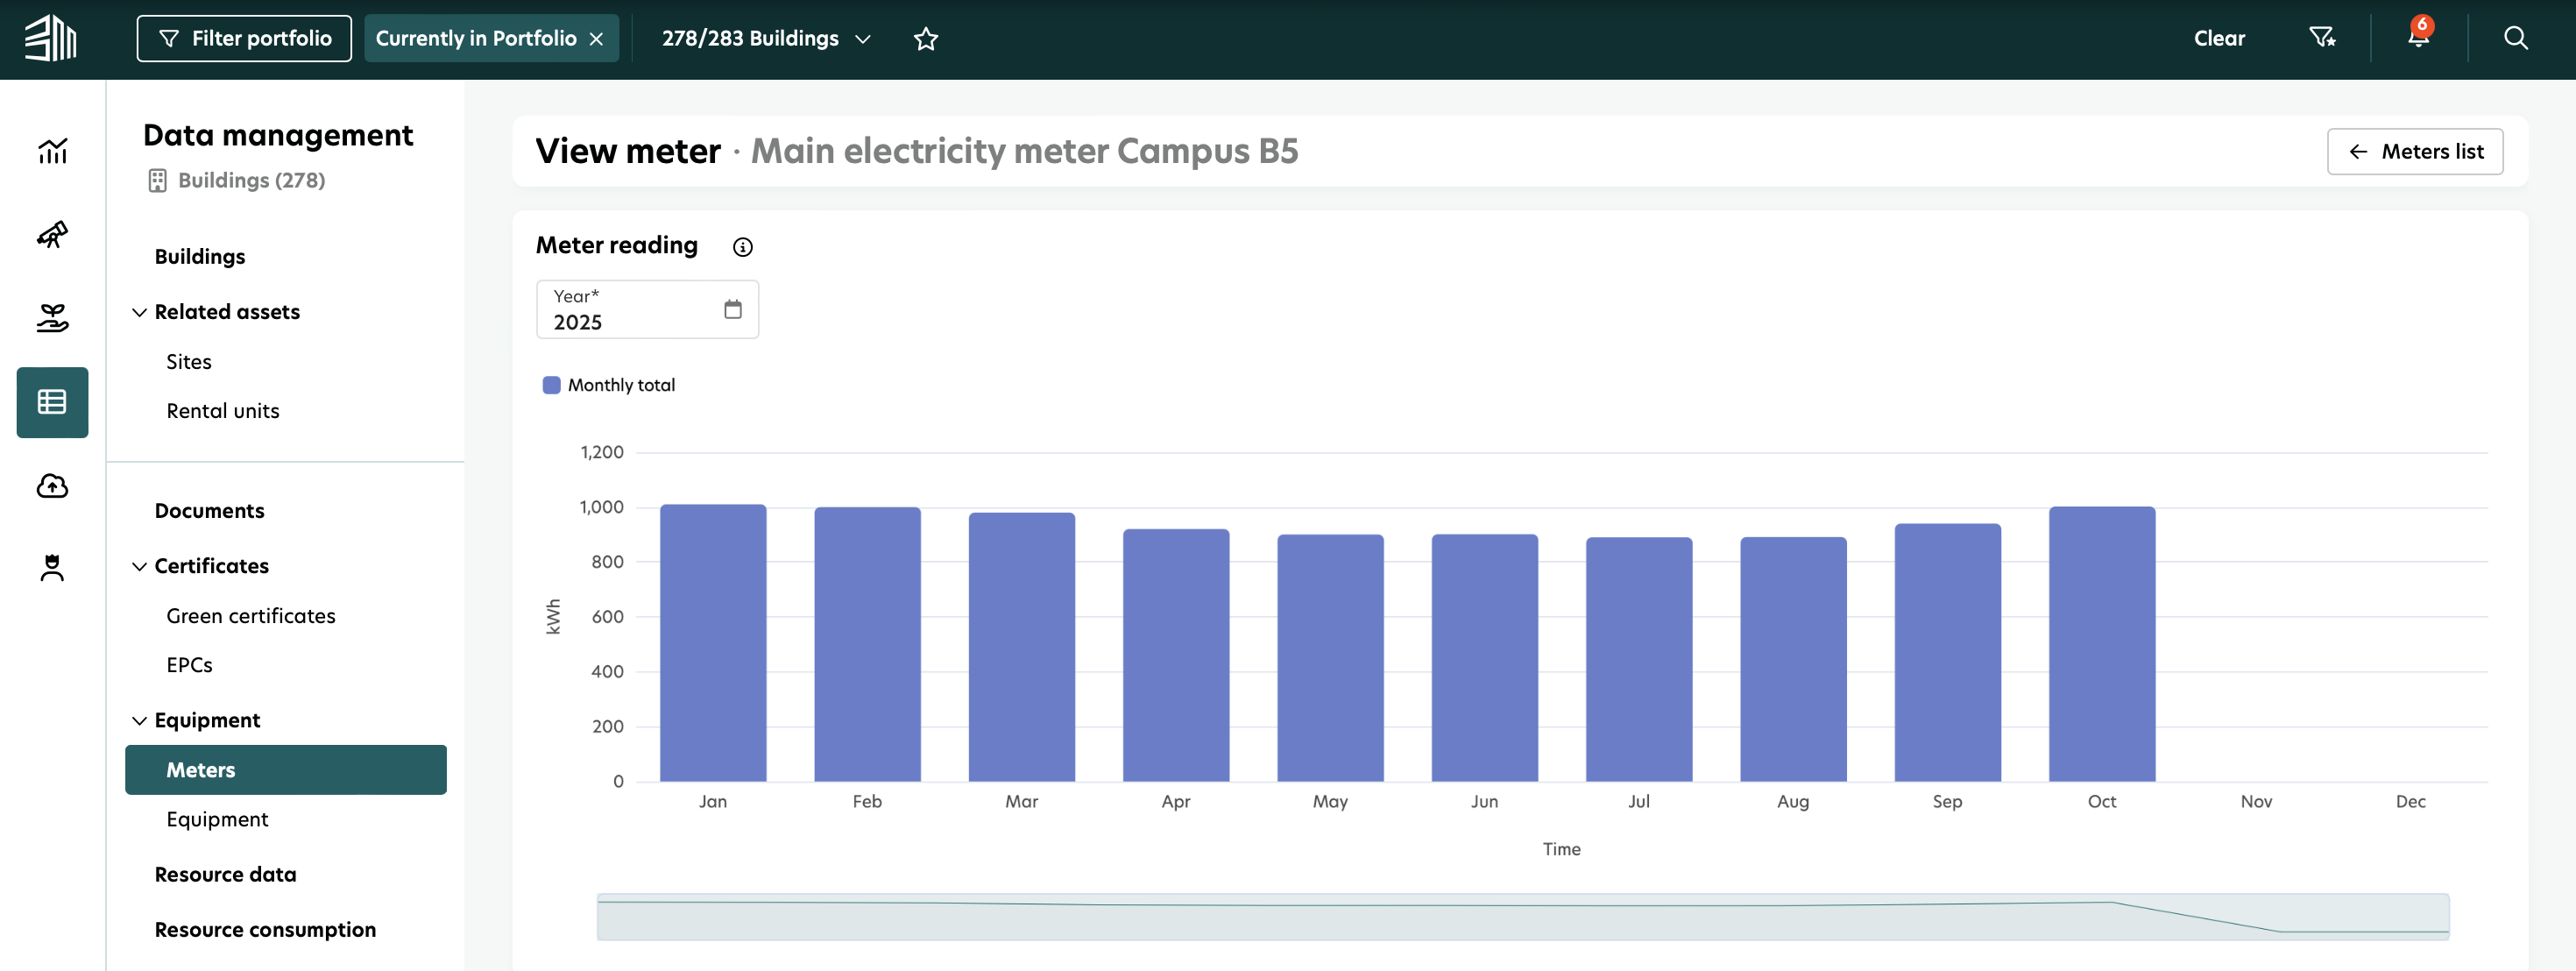
1. Meter reading - Displays recorded data over time. These represent readings received from the provider at specific points in time, which may not correspond exactly to the time frame they belong to. This helps you understand when each reading was received.
Select a specific year by using the Filter option "Year" to view monthly aggregated data for that period.
Click on any month in the chart to open a pop-up with detailed information for that month.
The left side shows daily readings, while the right side provides hourly breakdowns.
If a Meter records data every 15 minutes, the platform aggregates this into hourly values.
Click the arrow icon to expand and view 15-minute interval data.

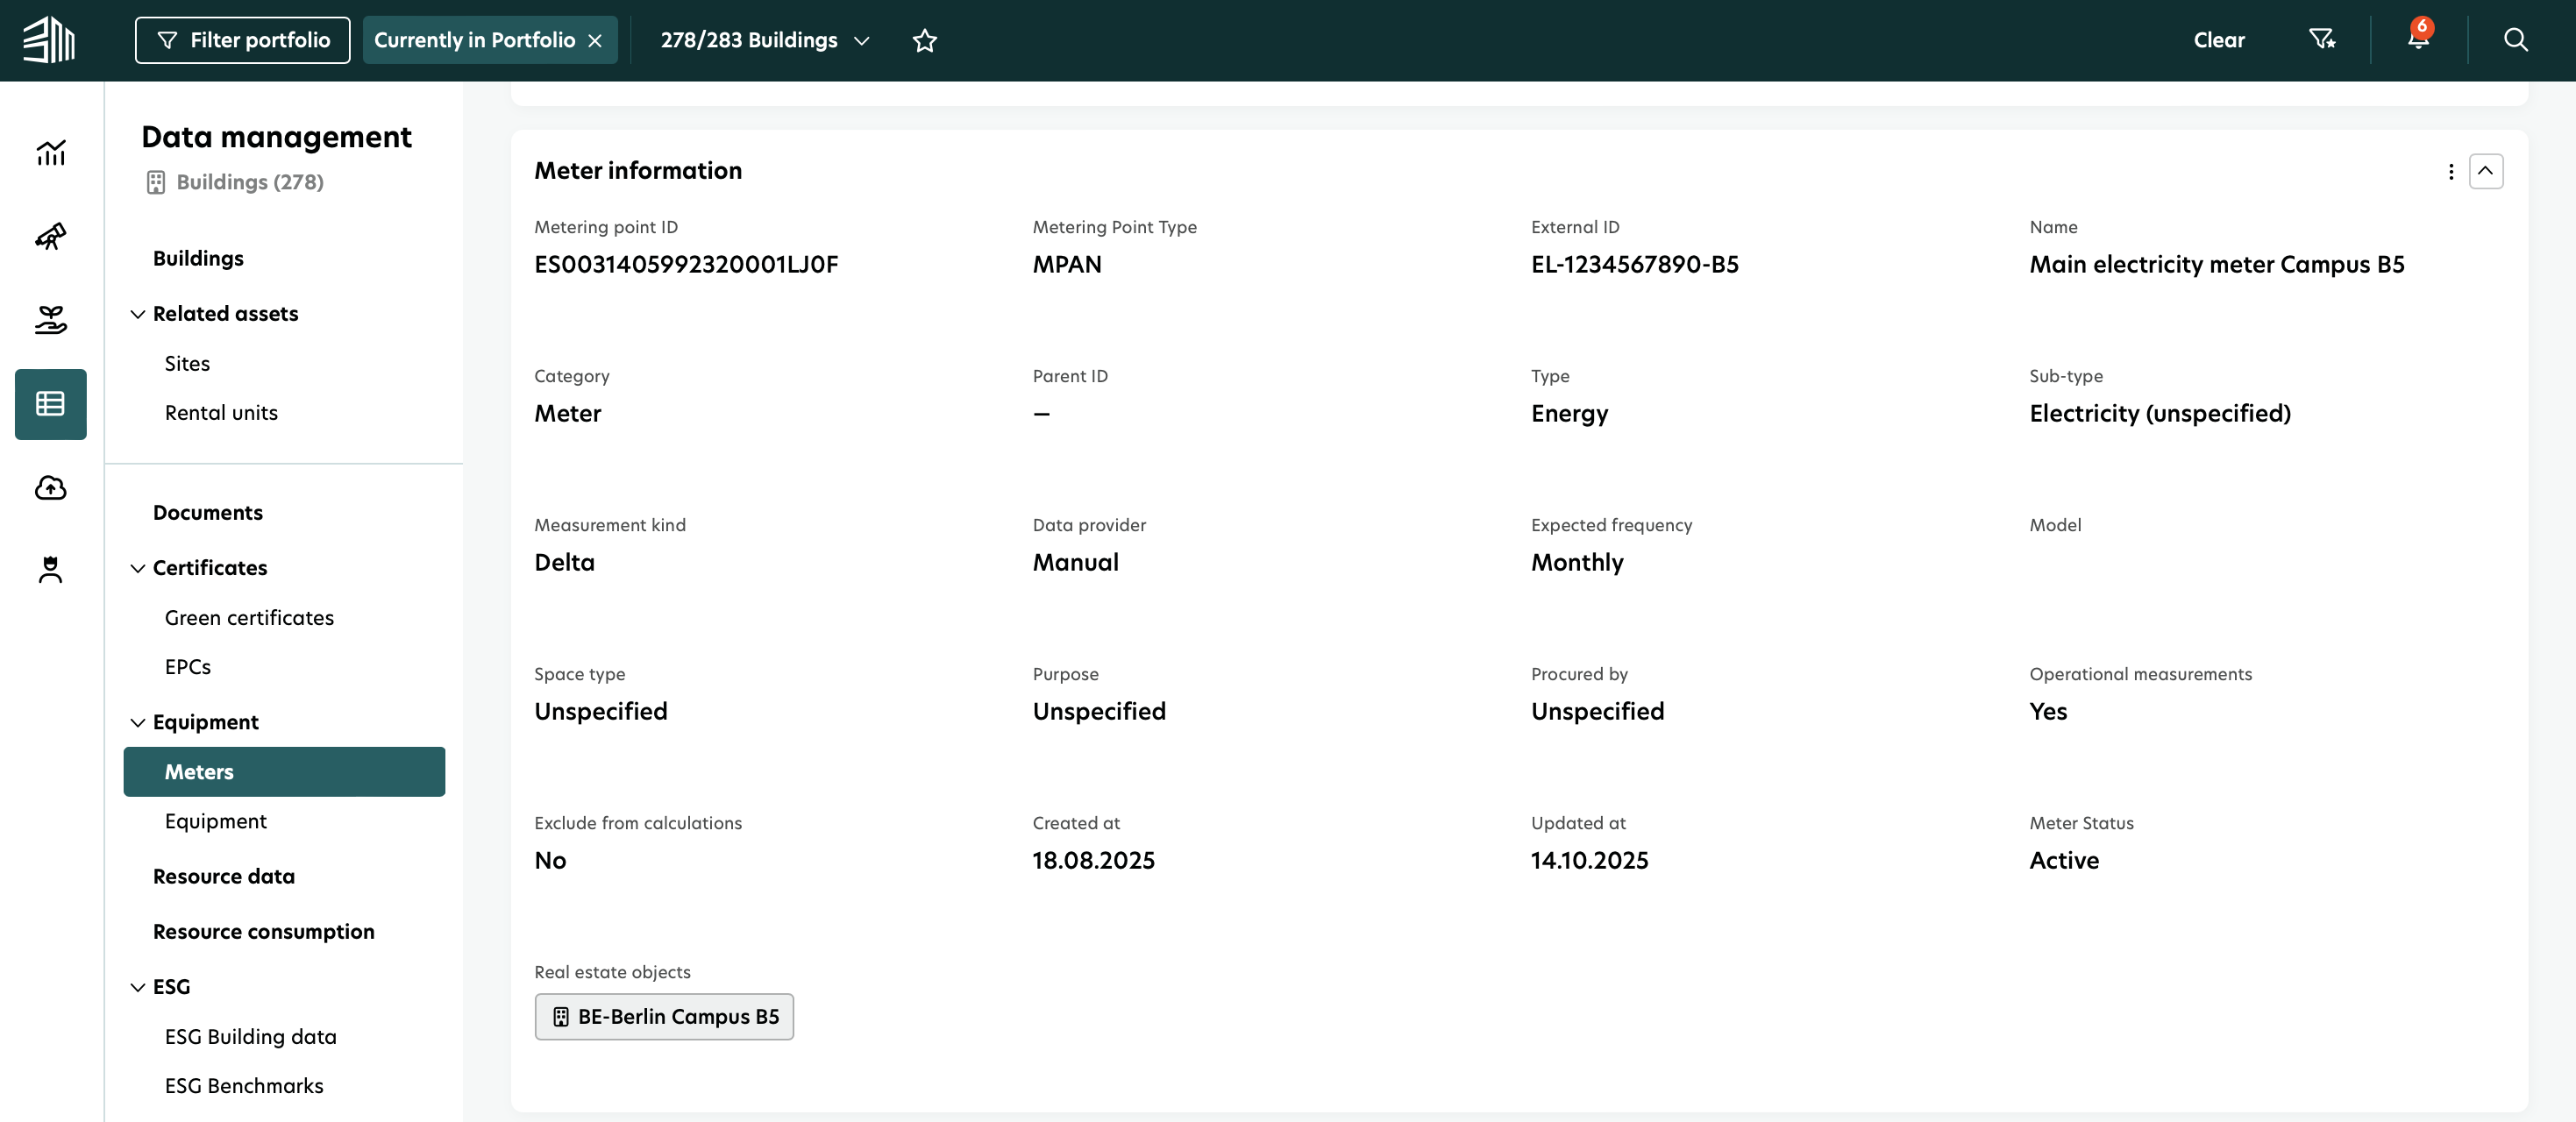
2. Meter information - Displays basic meter details, including:
The real estate object linked to the meter.
All previously entered meter attributes.
3. Meter Context (Current) - Displays additional meter information that is currently applicable to this meter.
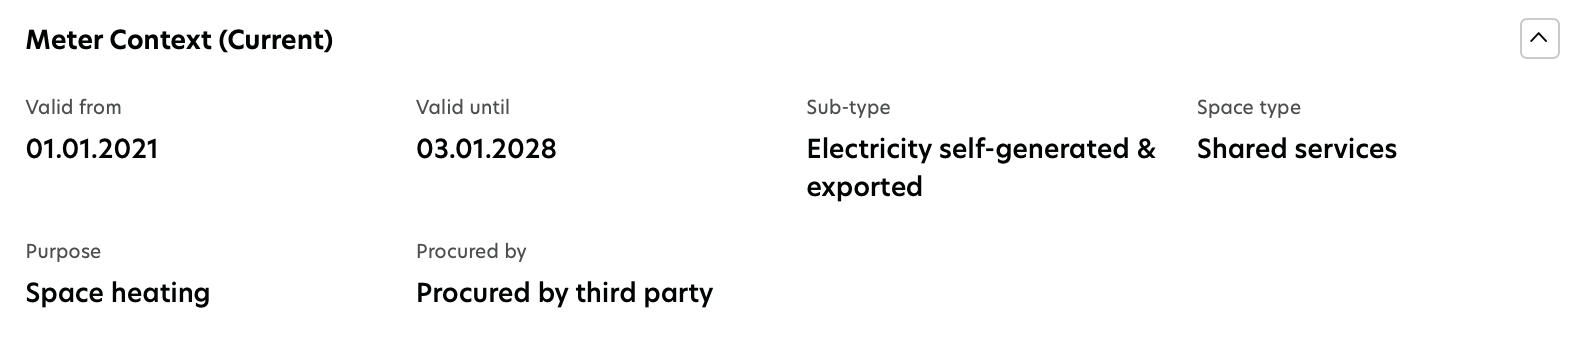
4. Meter Context (All) - Shows the history of all additional meter information for this meter, along with their validity periods, including the current one.

You can update any of these records for a specific validity period to provide more context to the meter’s data for sustainability calculations.
Meter to utility report
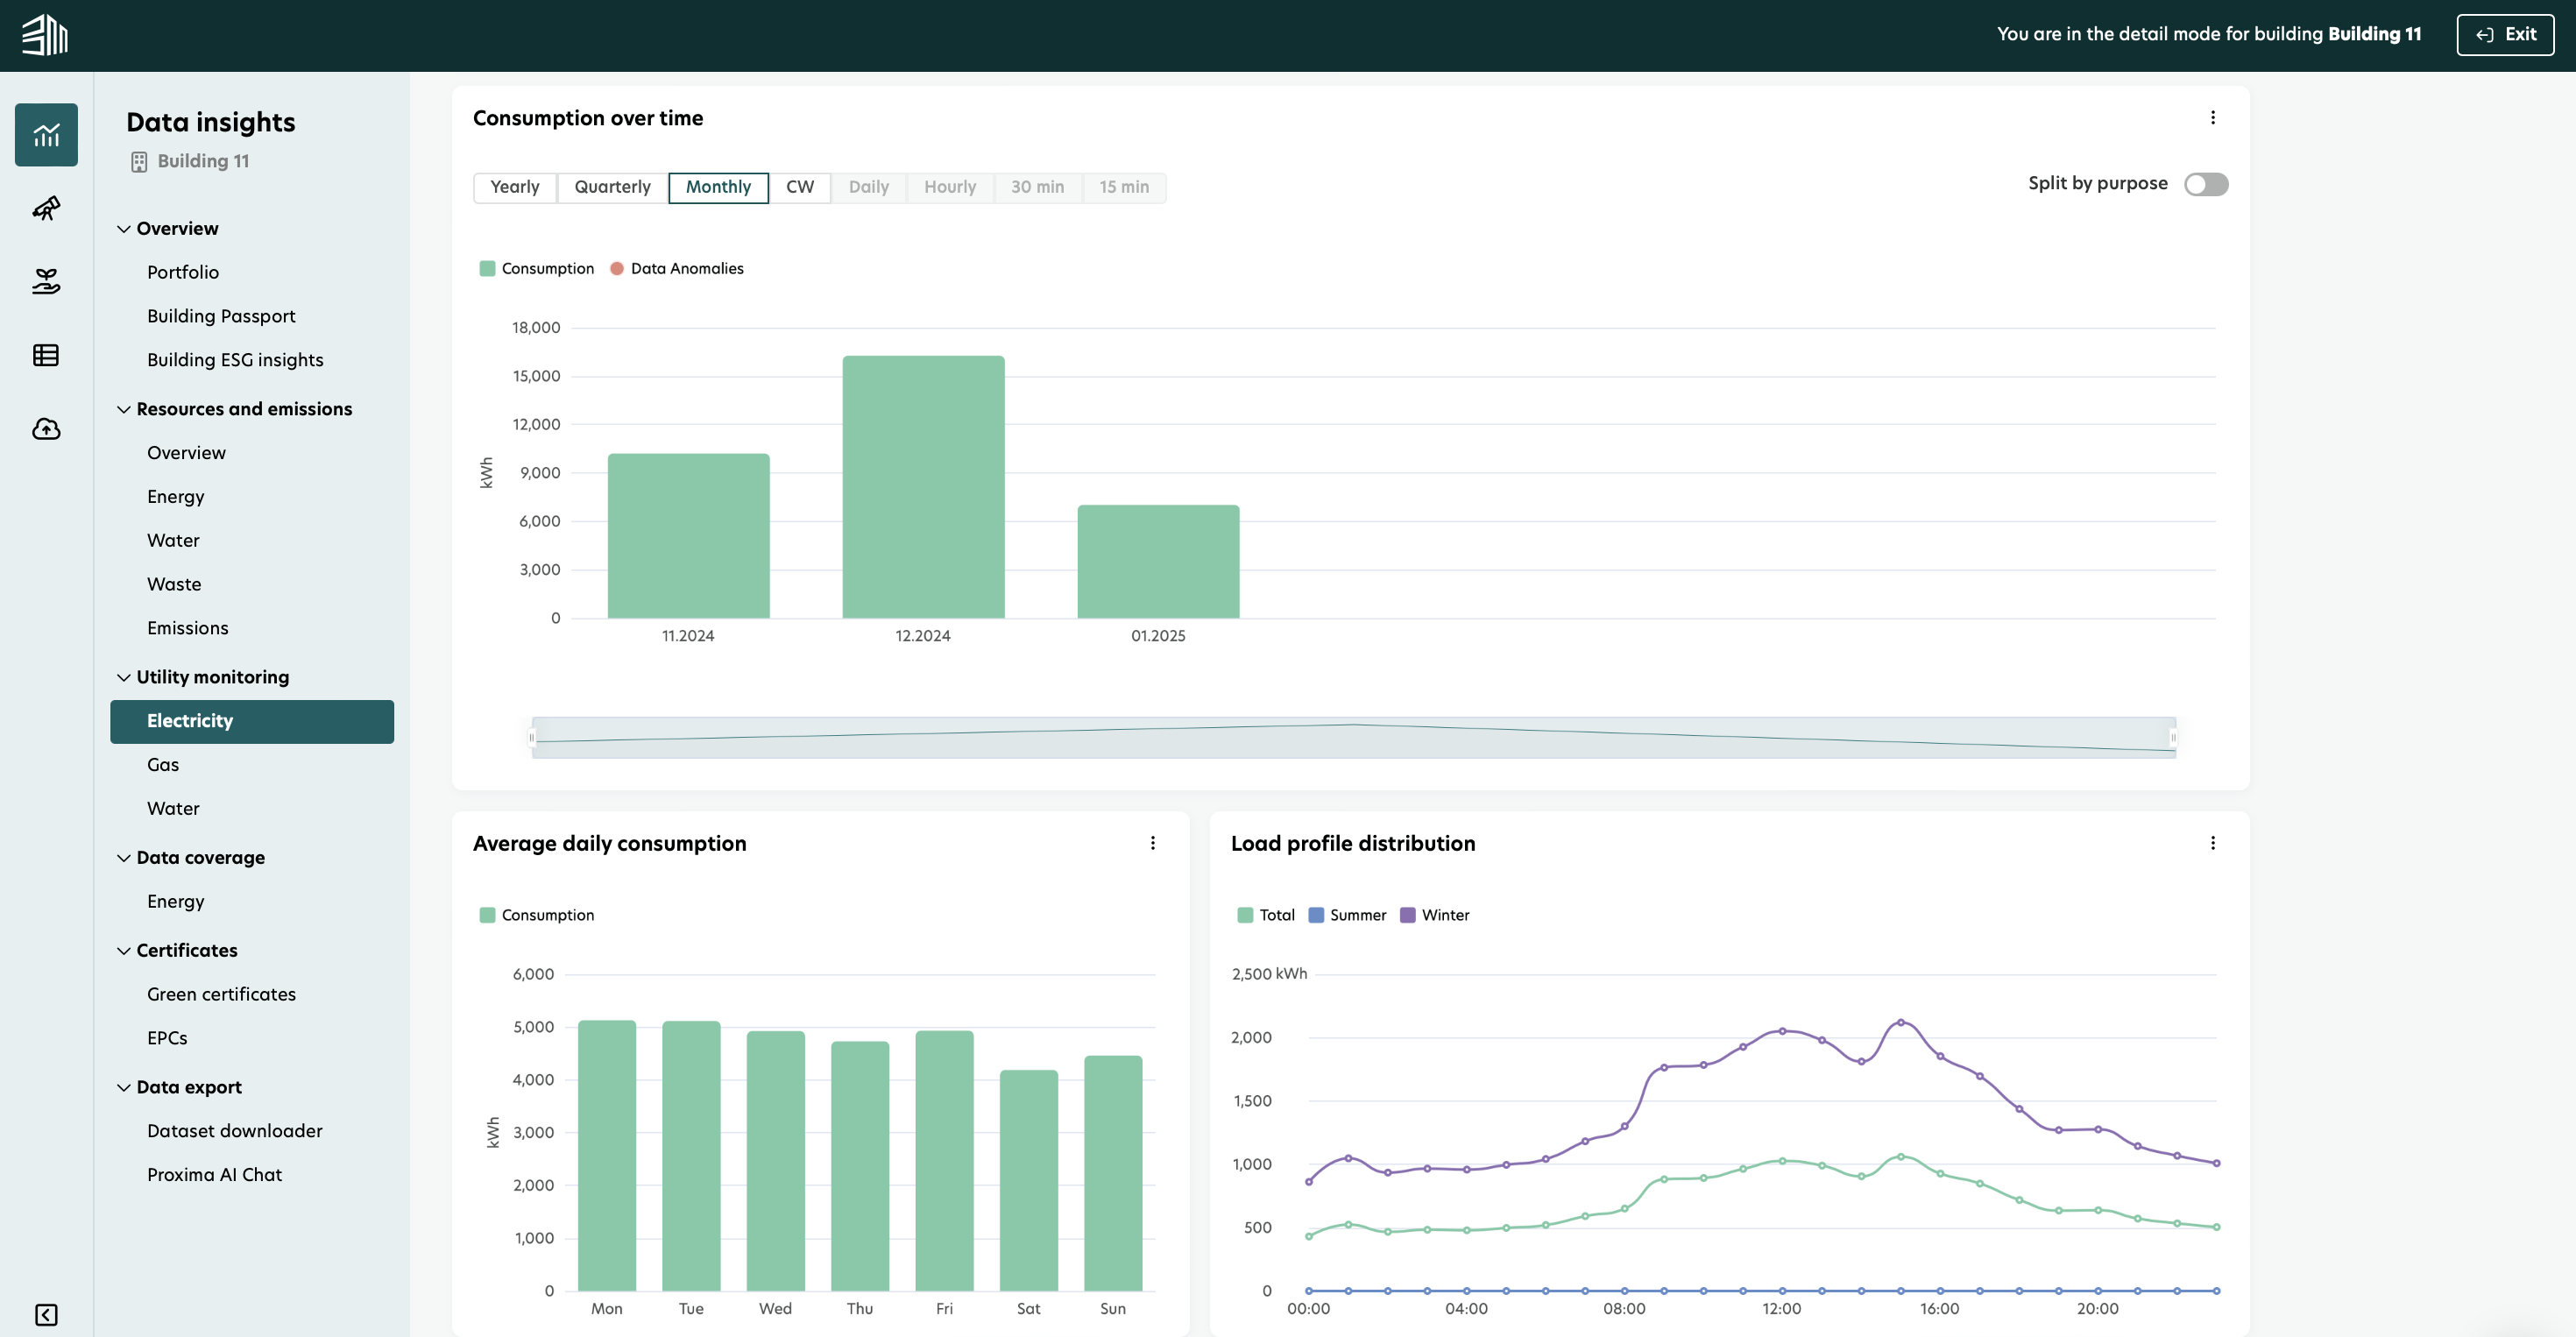
You can click the report icon next to any meter in the list to open a utility report with that meter already selected. This gives a complete visual overview of the energy consumption for that meter.
Video tutorial - Meter management
Here is a video tutorial to walk you through the Meter management process.