Area measurements management
The Area Measurements section helps you review, add, and maintain the different area details for each building.
Access Area Measurements
You can access the Area Measurements section in two ways:
Option 1: Navigate through the building list
Go to Data Management in the left-hand menu.
Select Buildings.
From the list, choose the building you want to work on.
Scroll to the bottom of the building details page until you reach the Area Measurements section.
Option 2: Use the filter to go directly to the building
Using the filtering option at the top of the platform, select the building you want to see.
Go to Data Management in the left-hand menu.
Select Buildings.
The building list will now show only the filtered building.
Click the building and scroll to the Area Measurements section at the bottom.
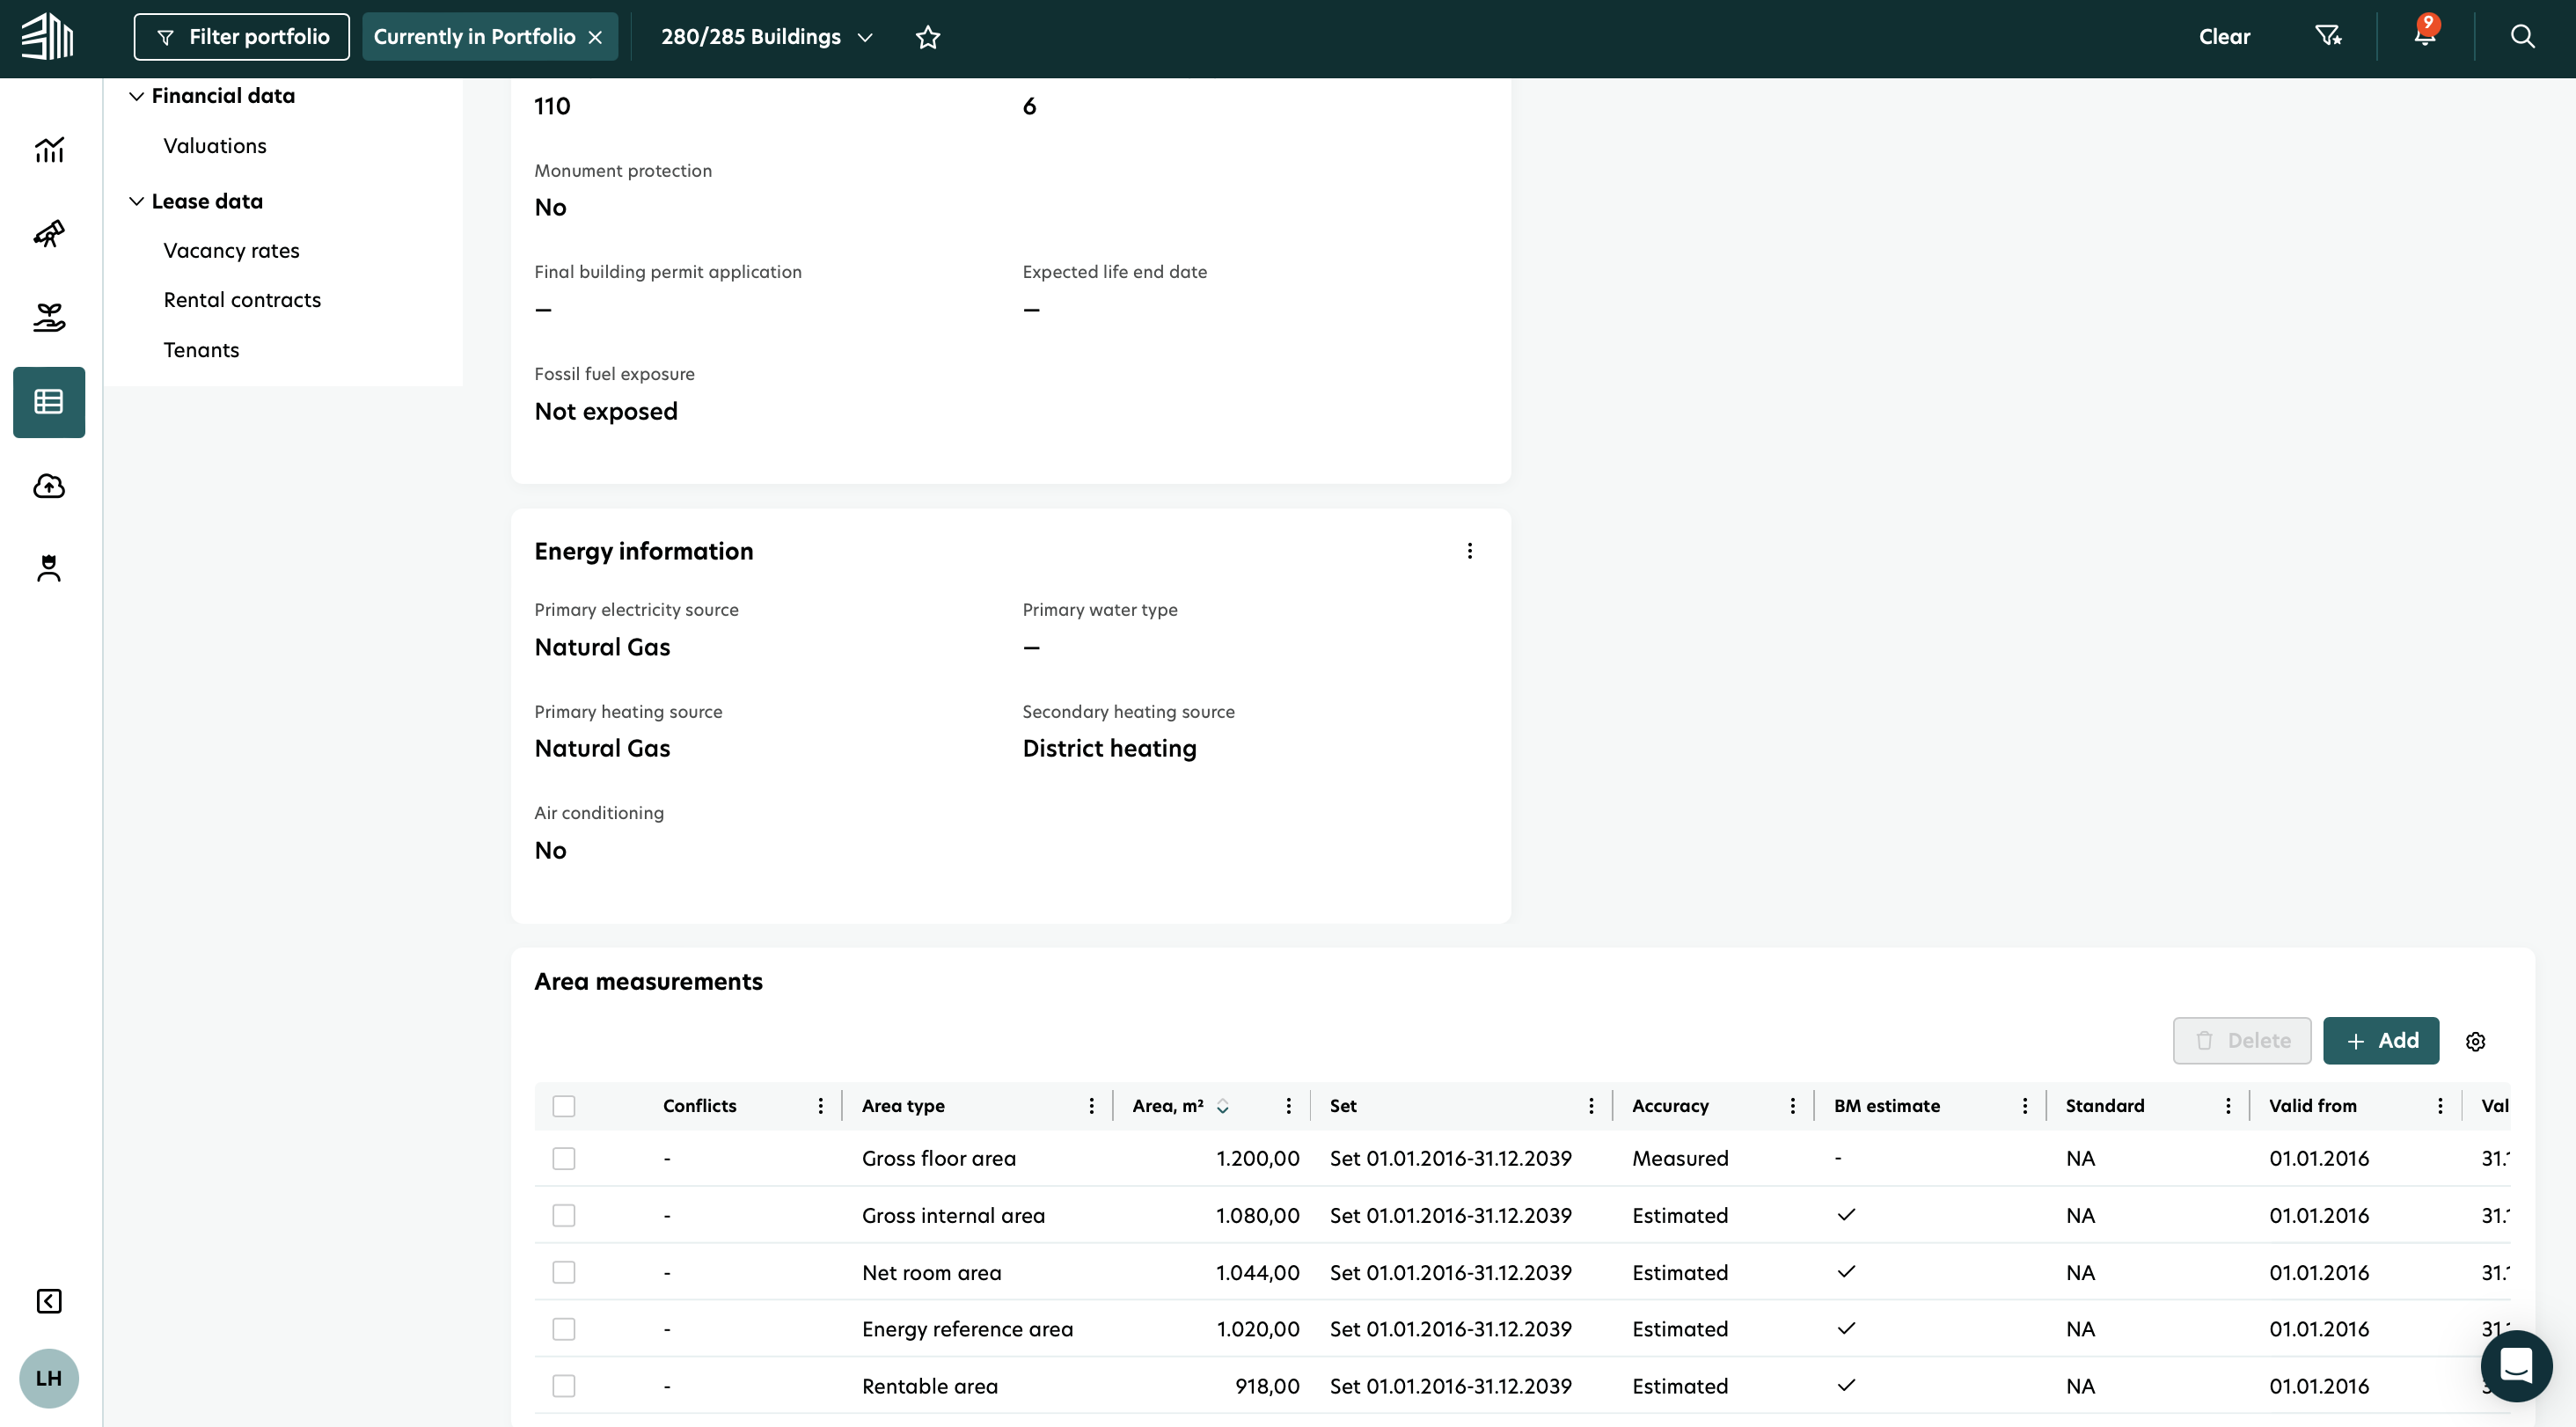
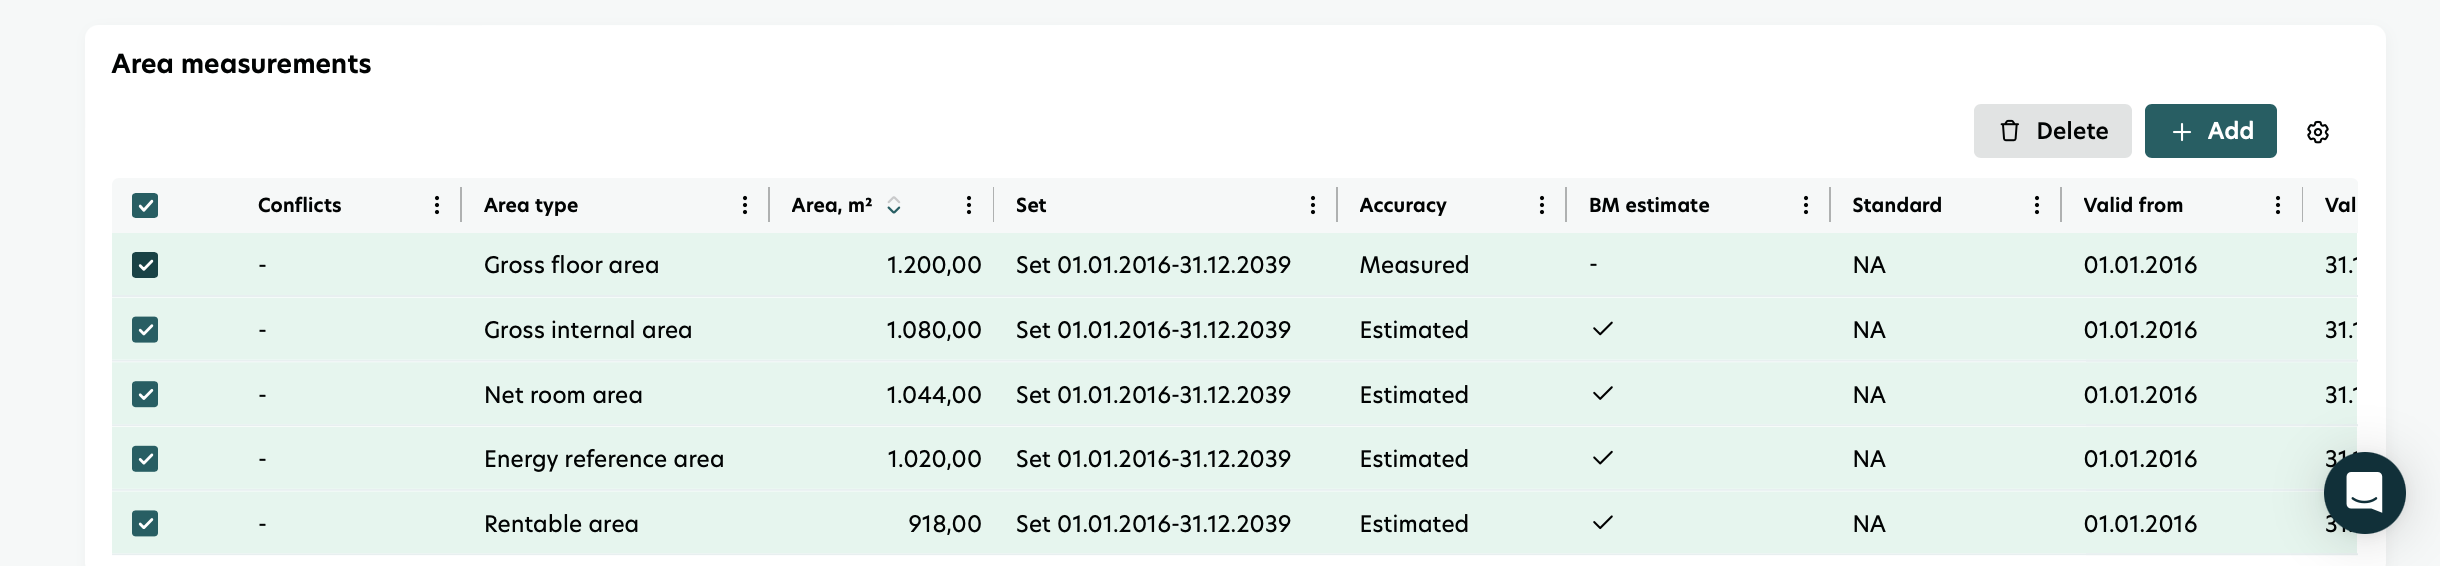
Managing Area Measurements
Once you reach the Area Measurements section, you can easily add new entries or update or delete existing ones using simple in‑platform actions.
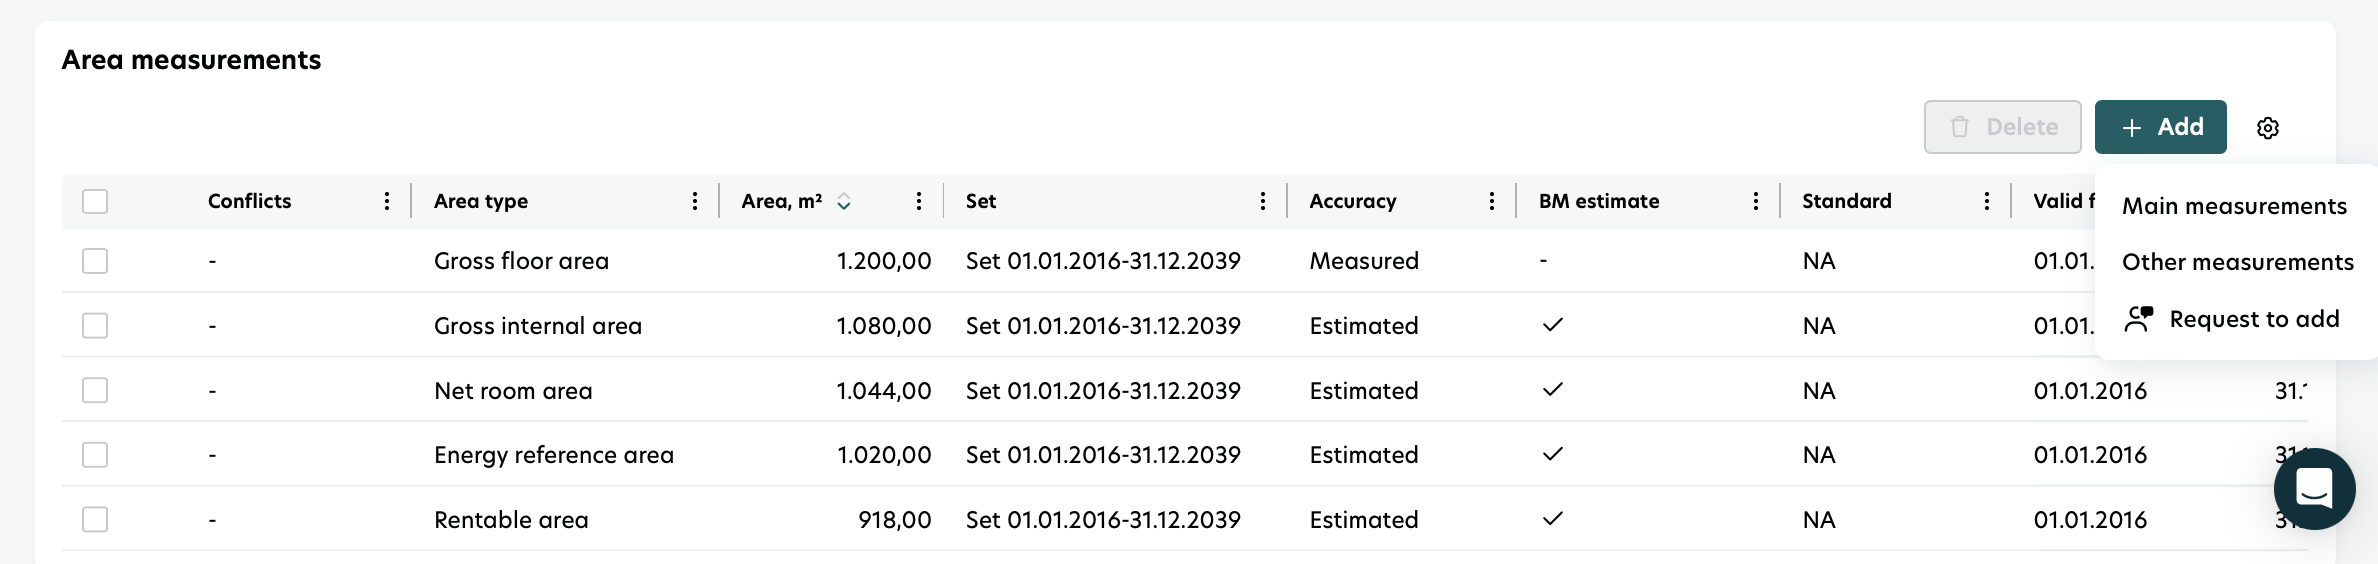
Add area measurements
You can add two types of area measurements:
Main measurements
Other measurements
To create a new entry:
Click Add button above the table.
Choose whether you want to add a Main or Other measurement.
A new form will open.
Complete the fields with the relevant data.
Click Save to add the measurement to the list.
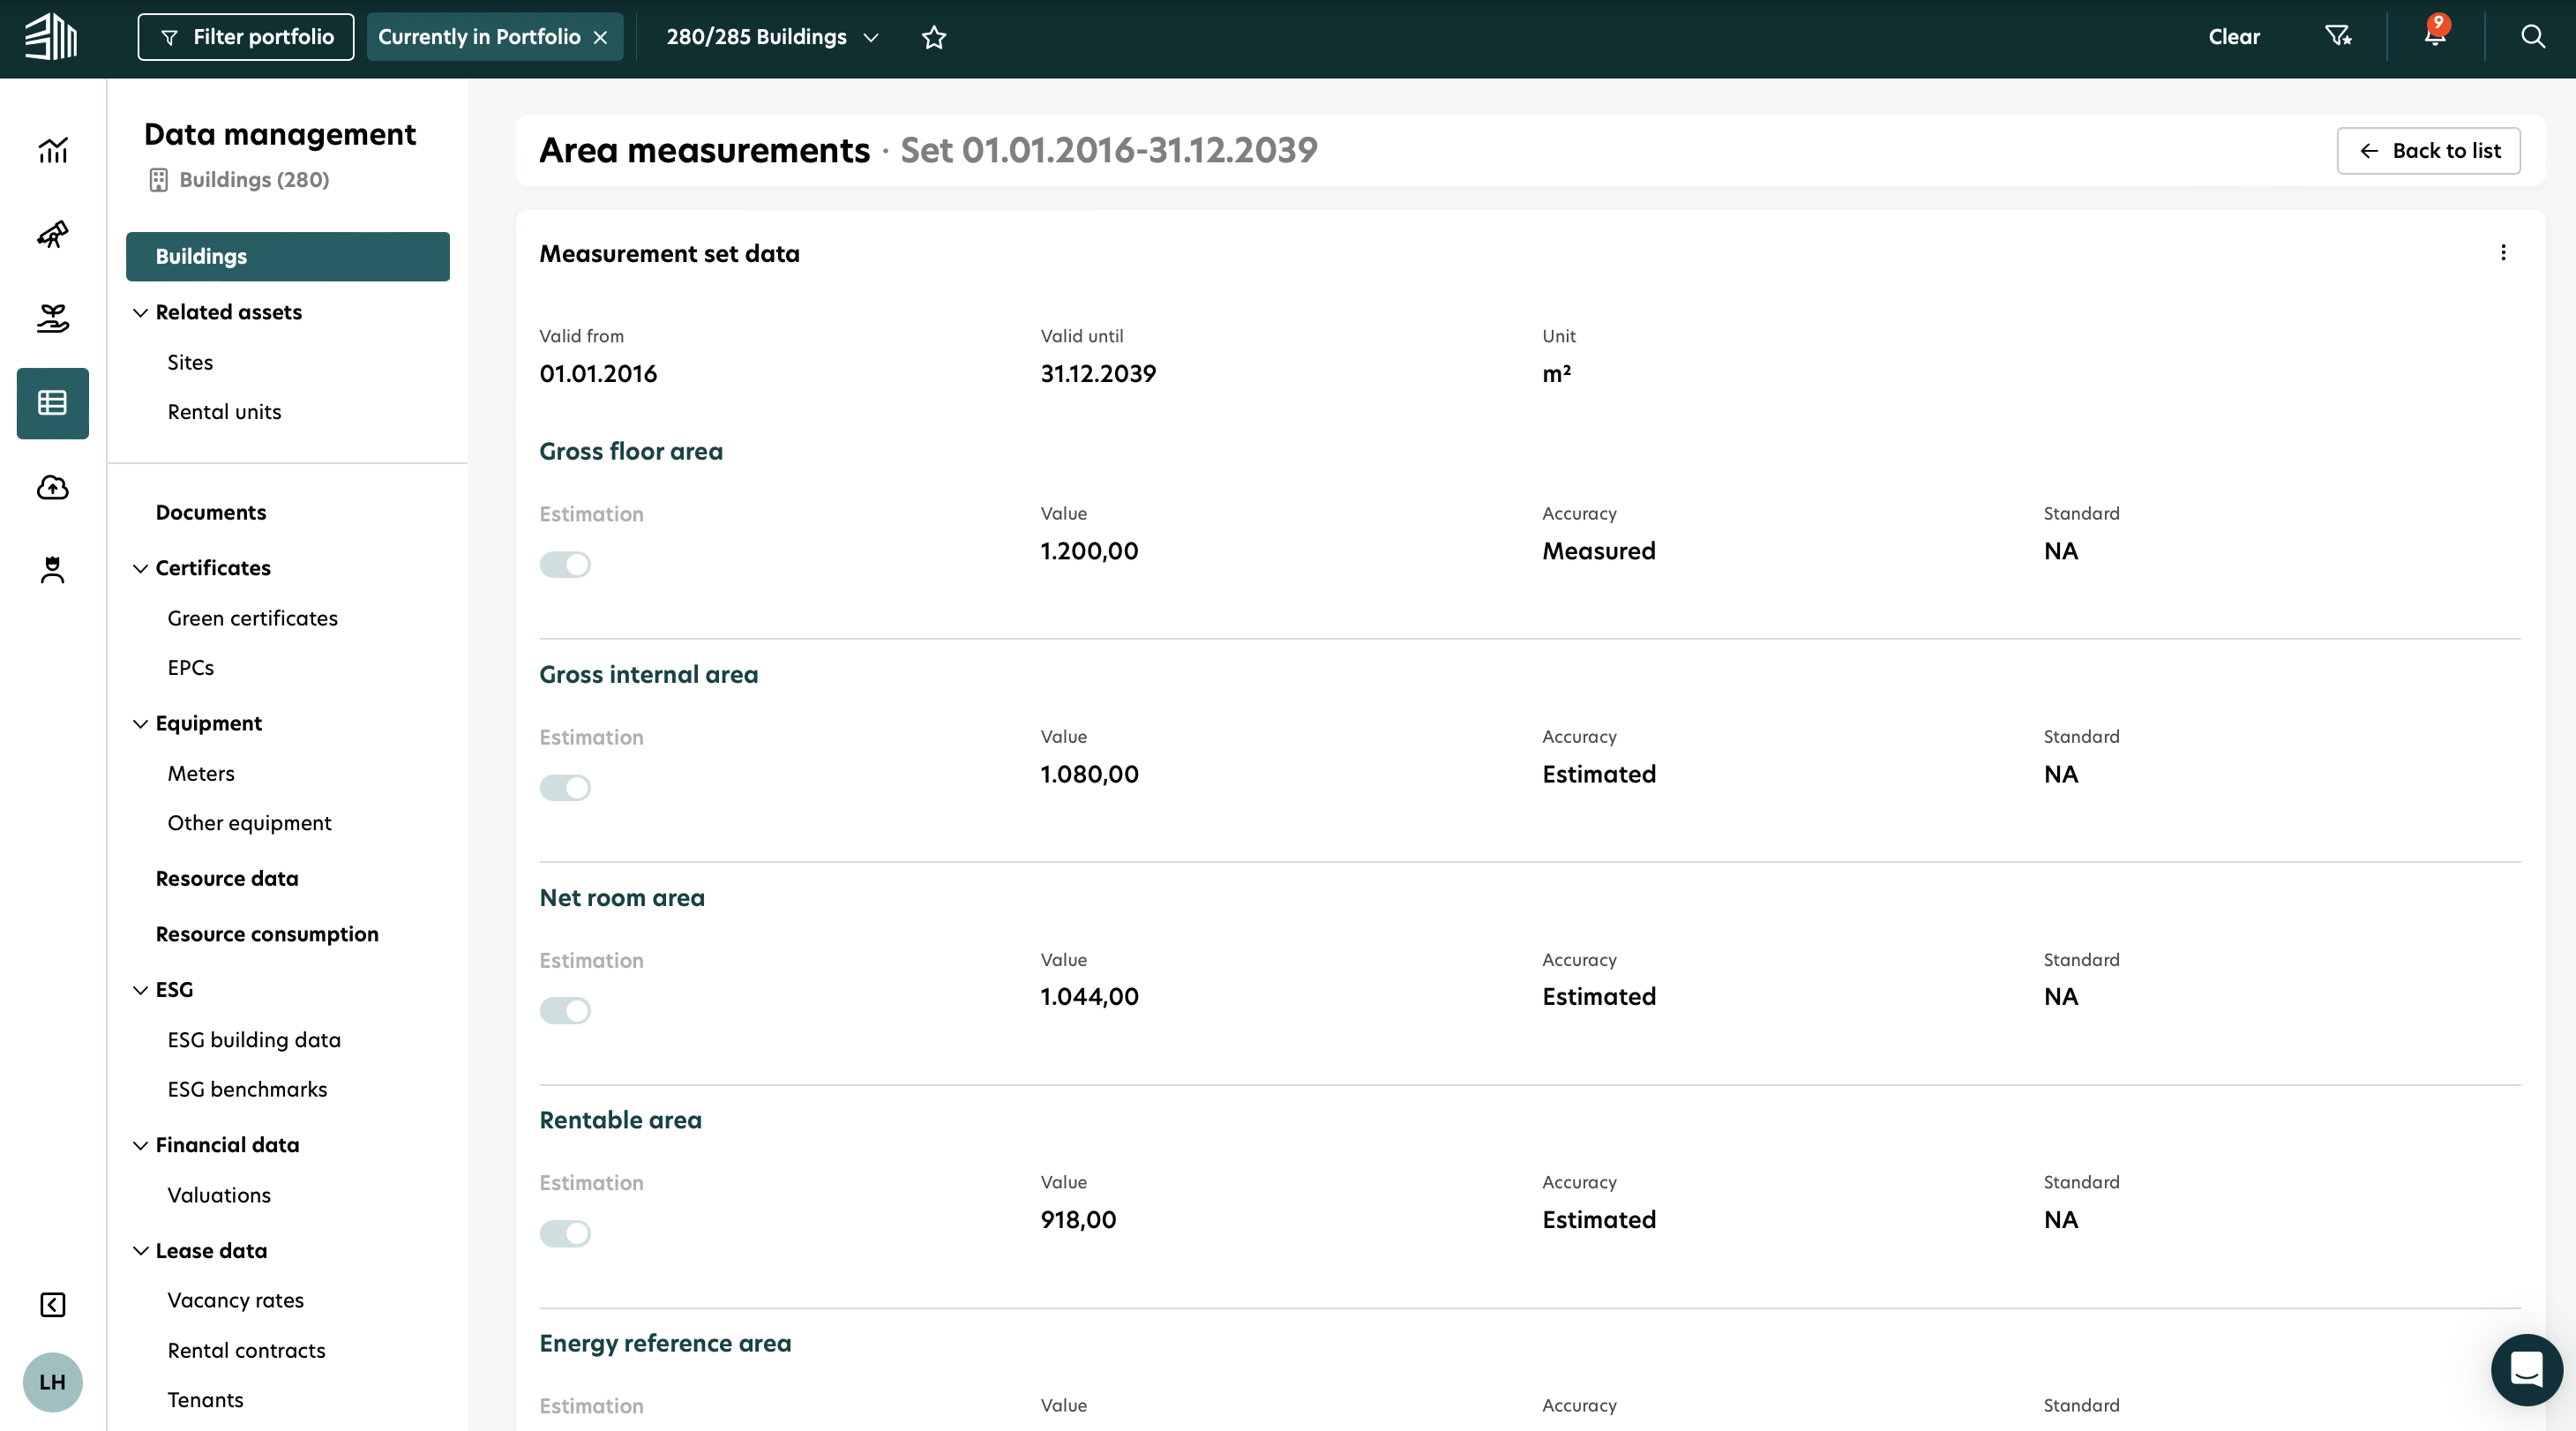
Display data
To see the full details of a specific area measurement:
Click on the row you are interested in.
A details page will open, showing all information for that measurement.
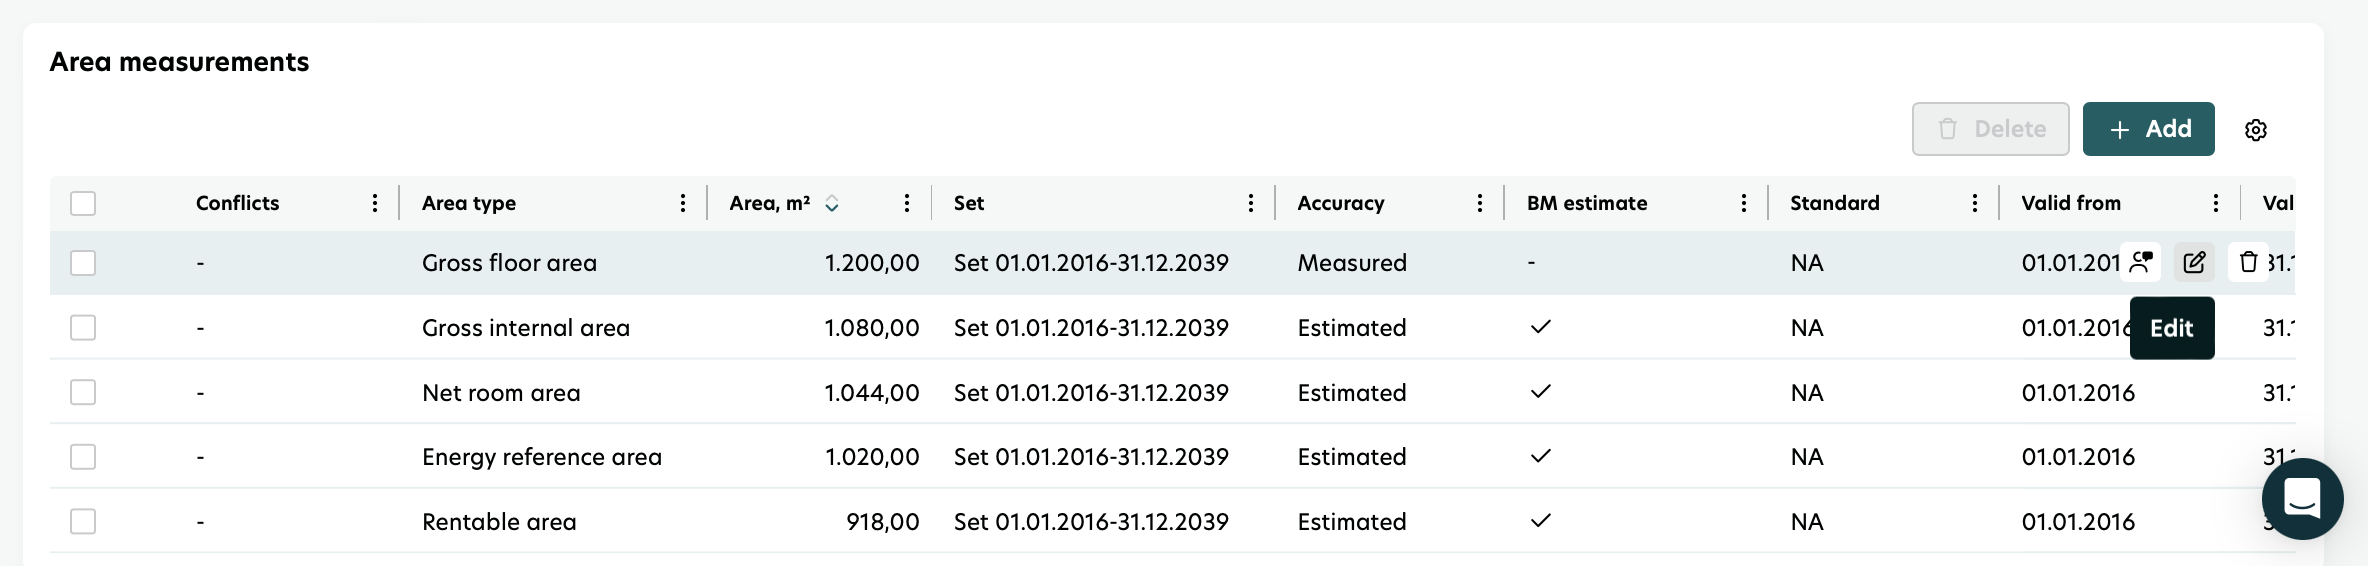
Edit area measurements
Hover over the row you want to update.
Click the pencil icon that appears.
The edit window will open with the existing information.
Make your changes and click Save.
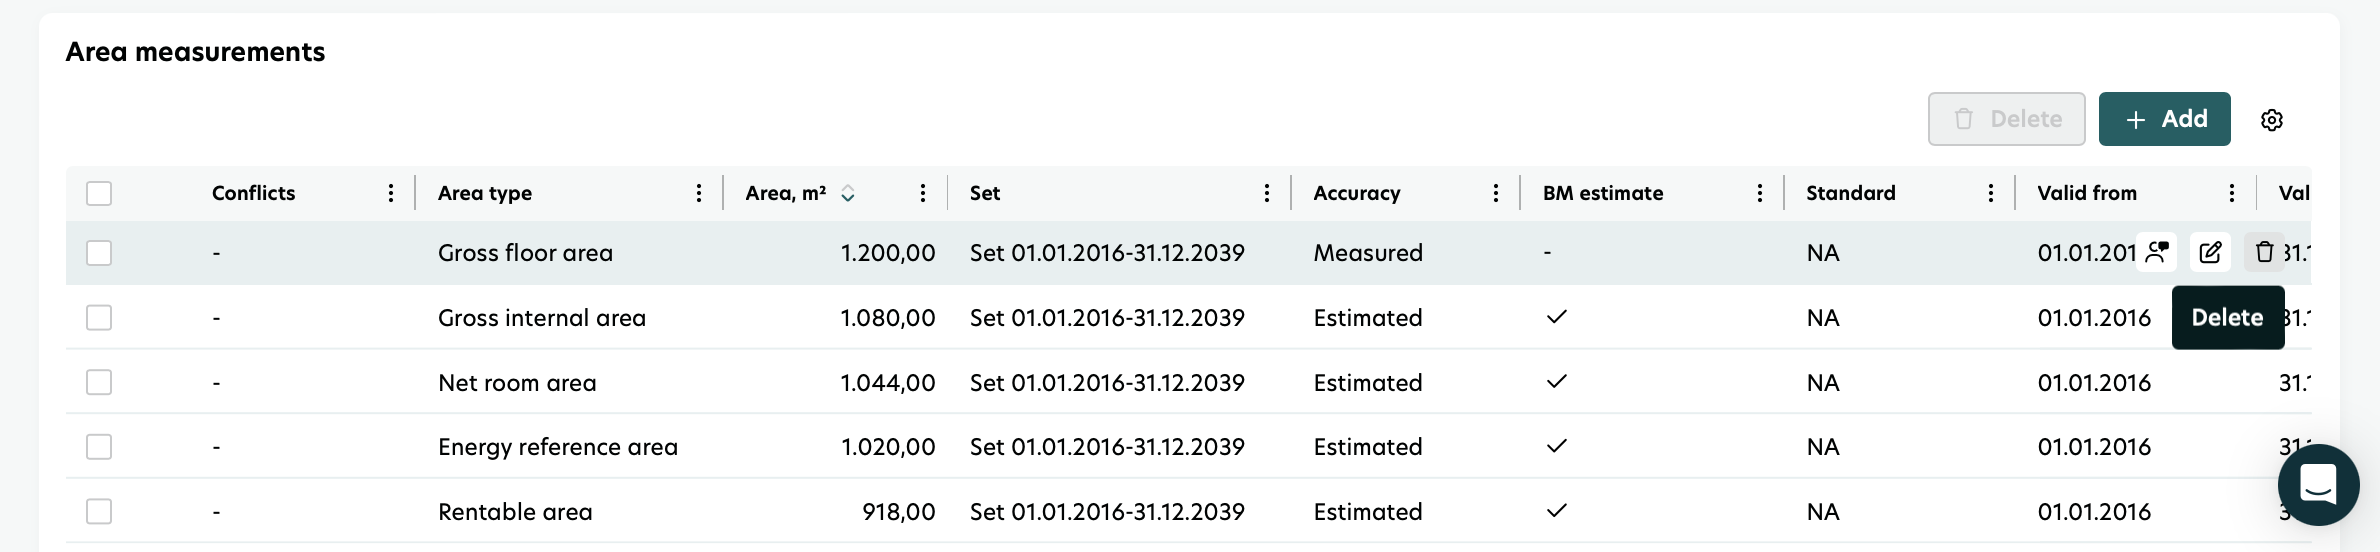
Delete area measurements
You can delete entries individually or in bulk.
Delete a single measurement
Hover over the row.
Click the delete icon that appears.
Confirm the deletion.
Bulk delete
Select multiple rows by clicking the checkbox at the start of each row.
Once the rows are selected, click the Delete button above the table.
Confirm the action to remove all selected measurements at once.