Invoice extractor
The Invoice extractor tool simplifies invoice management by enabling users to upload, review, and manage PDF invoices on the New platform. It automatically extracts consumption data and time periods from the invoices, allowing users to edit, approve, or reject them as needed for reporting purposes.
Key features
Single and multiple invoice upload
Users can upload single or multiple valid PDF invoices with a toast notification confirming successful uploads.Review and update
Users can review, edit, and save extracted invoice data for approval and reporting.Invoice rejection and restoration
Invoices can be rejected and restored with notifications ensuring smooth management of uploaded, approved, and rejected invoices.Approval workflow
Approved invoices are processed and added to the Data Management table for integration into the database.Metering point extraction and mapping to meters
Users can retrieve metering point ID from the invoice and match it to an existing meter in the BuildingMinds system.
Supported units
For each type and sub-type of utility, we support different units for the consumption data extracted.
Here is an overview of the supported units:
Unit of extraction | m³, kWh, Mbtu, thm, ccf cubft, dth | m³, l, gal, yd³, ccf, cubft, kgal | kWh, MWh | kWh, MWh, RTh | kWh, MWh, Mbtu, thm | kg, ton, lb, |
Utility types | Natural gas standard mix Green natural gas | Water discharge Water consumption unspecified Fresh water municipal water supply | Electricity self generated and exported Electricity from grid green electricity contract Electricity self generated and consumed Electricity unspecified Electricity from grid normal contract | District cooling | Fuel unspecified District heating Oil based fuels Solar thermal Biomass | Waste Incineration: hazardous / non-hazardous Landfill: hazardous / non-hazardous Recycling: hazardous / non-hazardous Reuse: hazardous / non-hazardous Waste to energy: hazardous / non-hazardous Other/Unknown: hazardous / non-hazardous |
Normalized unit | kwh | m³ | kwh | kwh | kwh | kg |
To avoid rounding errors, conversions are kept to a minimum. All calculations are done with existing formulas in the metric system.
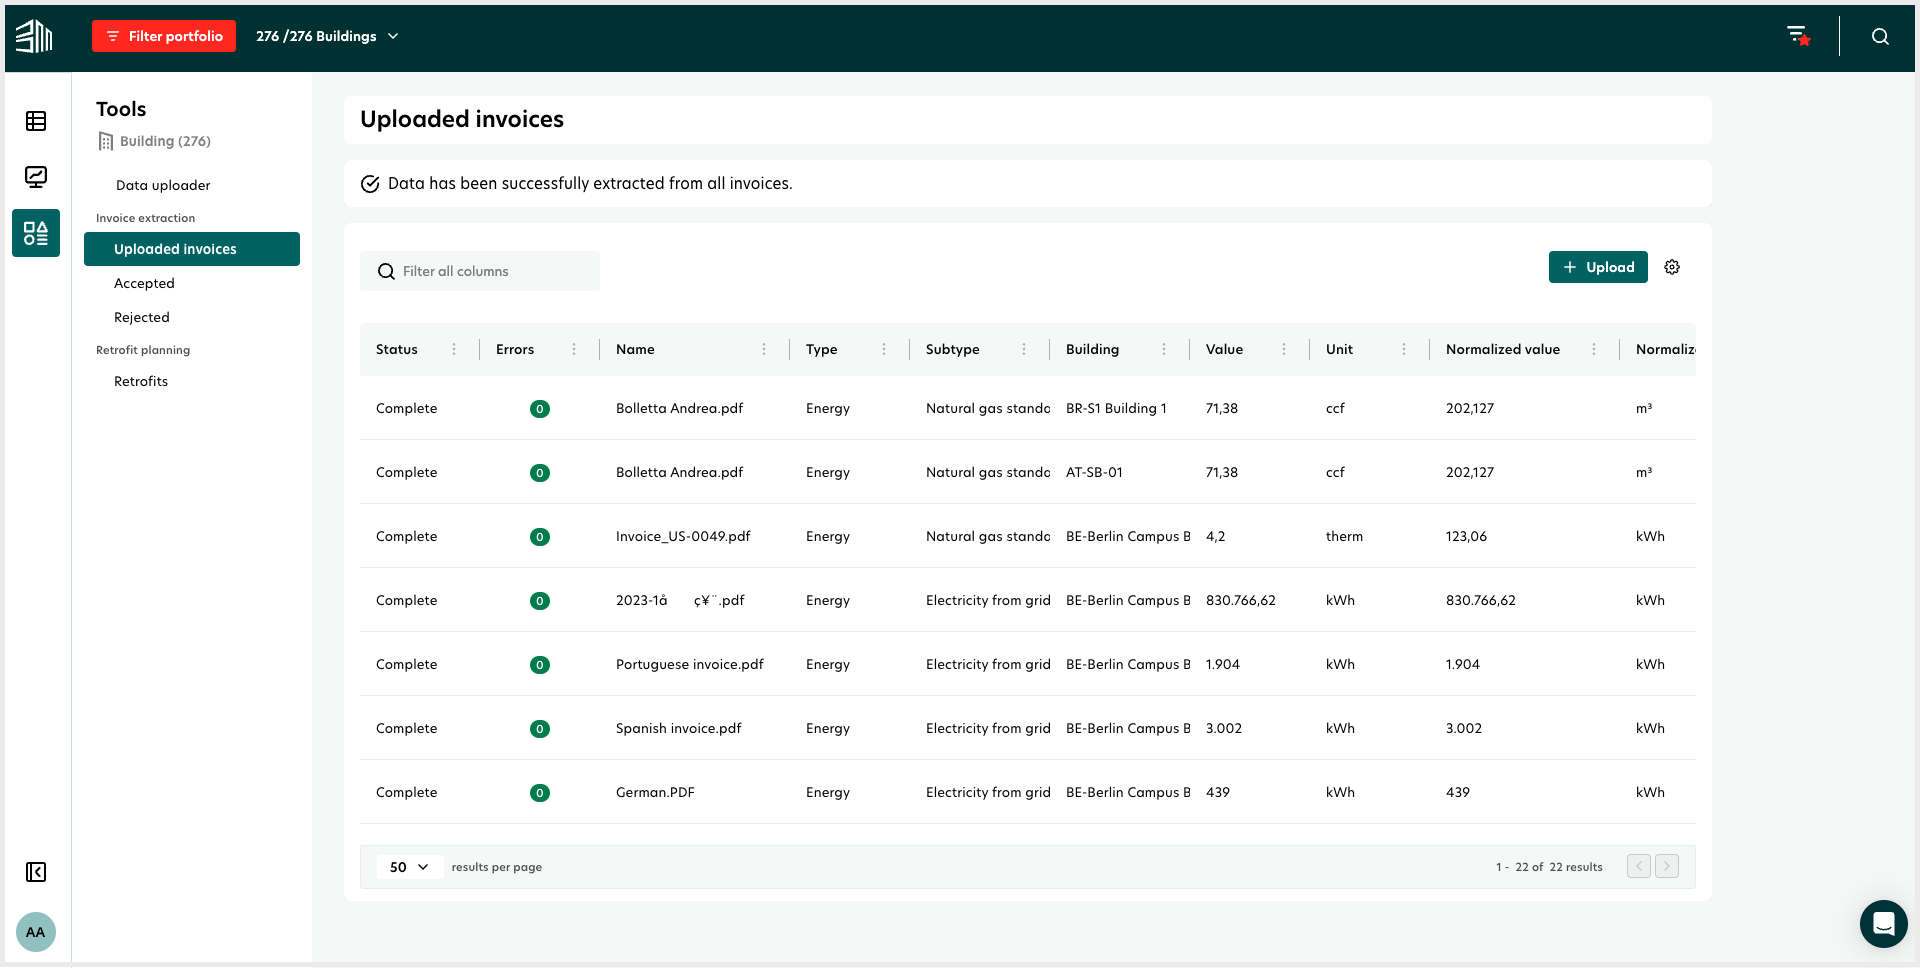
Access Invoice extractor
1. Click on Tools.
2. Select Uploaded invoices under Invoice extractor.
The Invoice extractor can be used in two ways by uploading a single invoice or by uploading multiple invoices.
Single invoice upload
Click on Tools.
Navigate to Invoice extractor.
Click on Uploaded invoices and then on the Upload to upload a PDF invoice.
The invoice will appear in the uploaded list. A toast notification will confirm the upload.
Multiple invoice upload
Click on Tools.
Navigate to Invoice extractor.
Click on Uploaded invoices and then on the Upload to upload a PDF invoice.
The invoice counter will increase by the number of uploaded invoices, and they will appear in the list. A toast notification will confirm the upload.

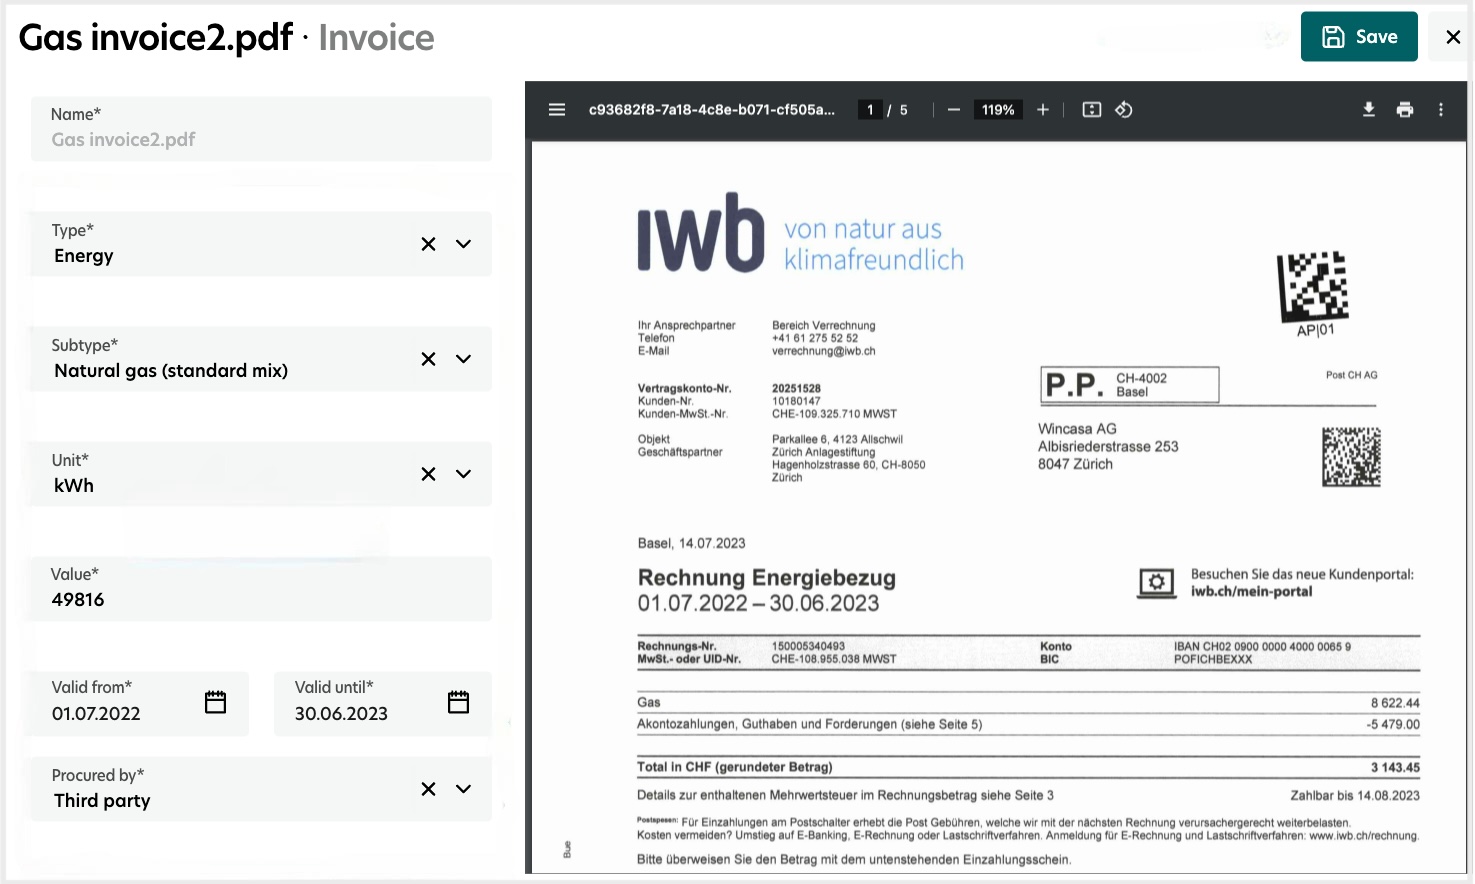
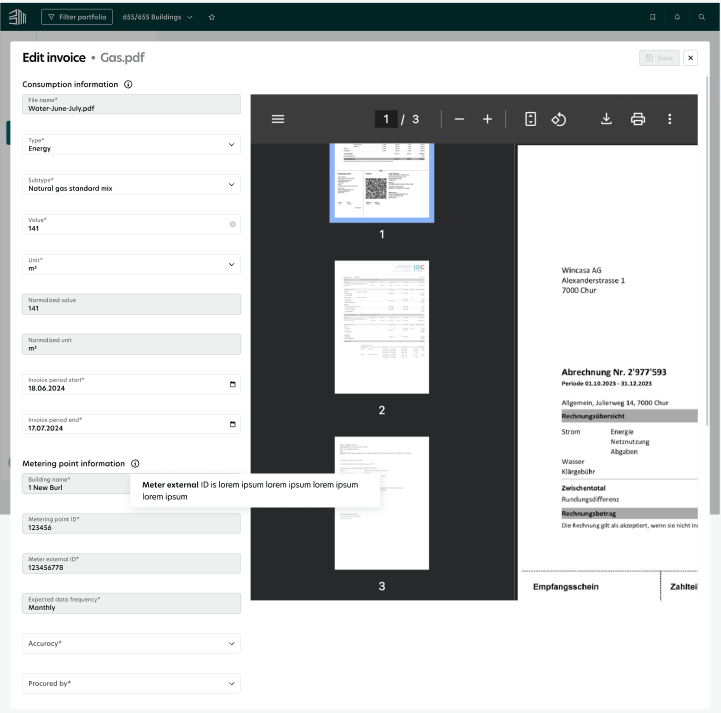
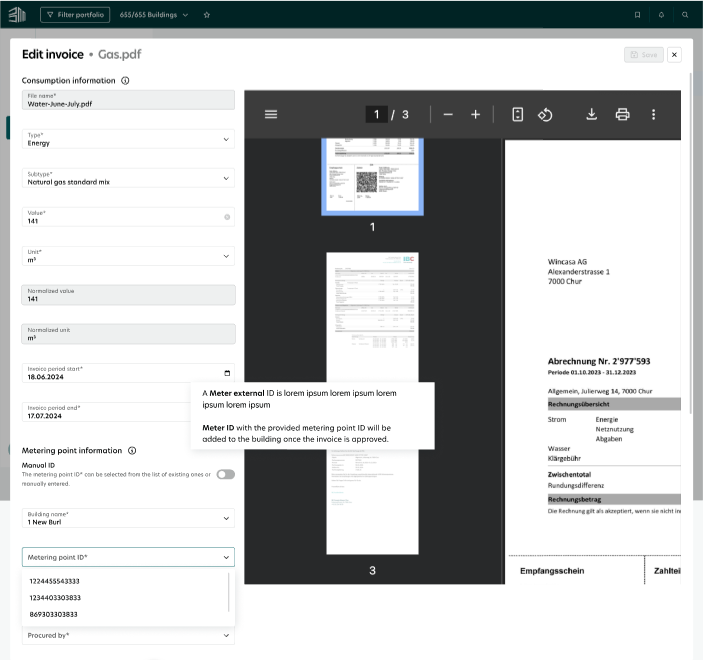
Review and update invoice data
Click on the invoice to review the extracted data.
Edit the data as needed.
Click Save and receive a confirmation notification.
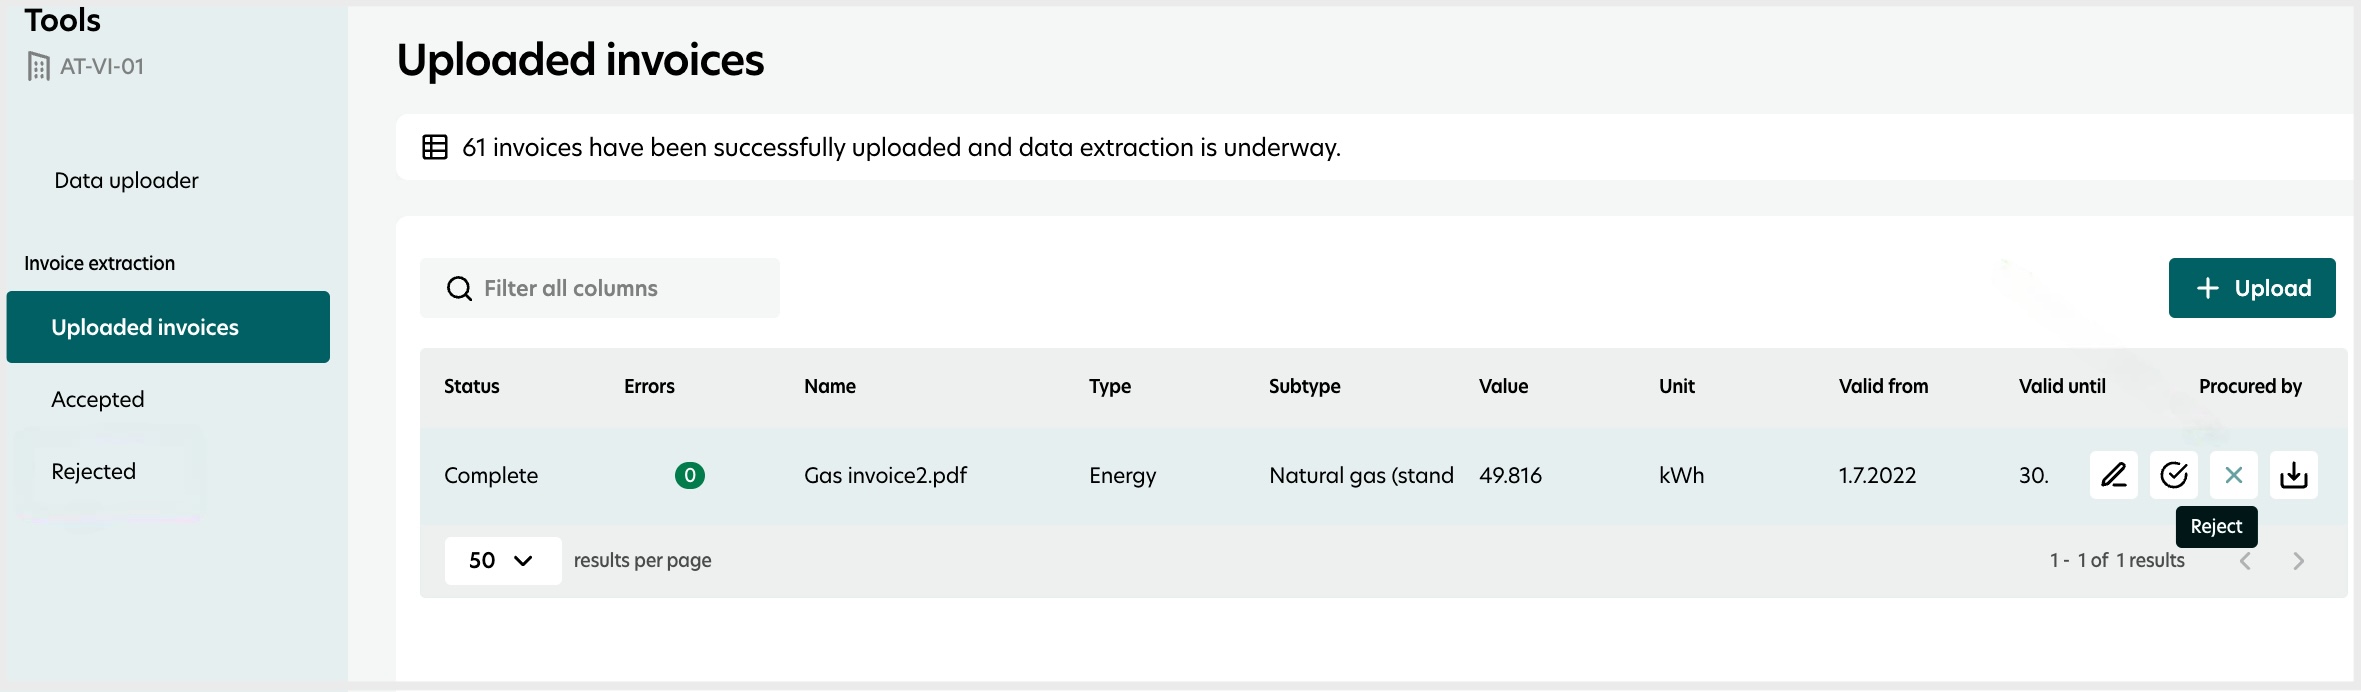
Reject an invoice
Hover over the invoice in the list.
Click the Reject icon.
Confirm rejection with a toast notification, and the invoice will move to the rejected list.
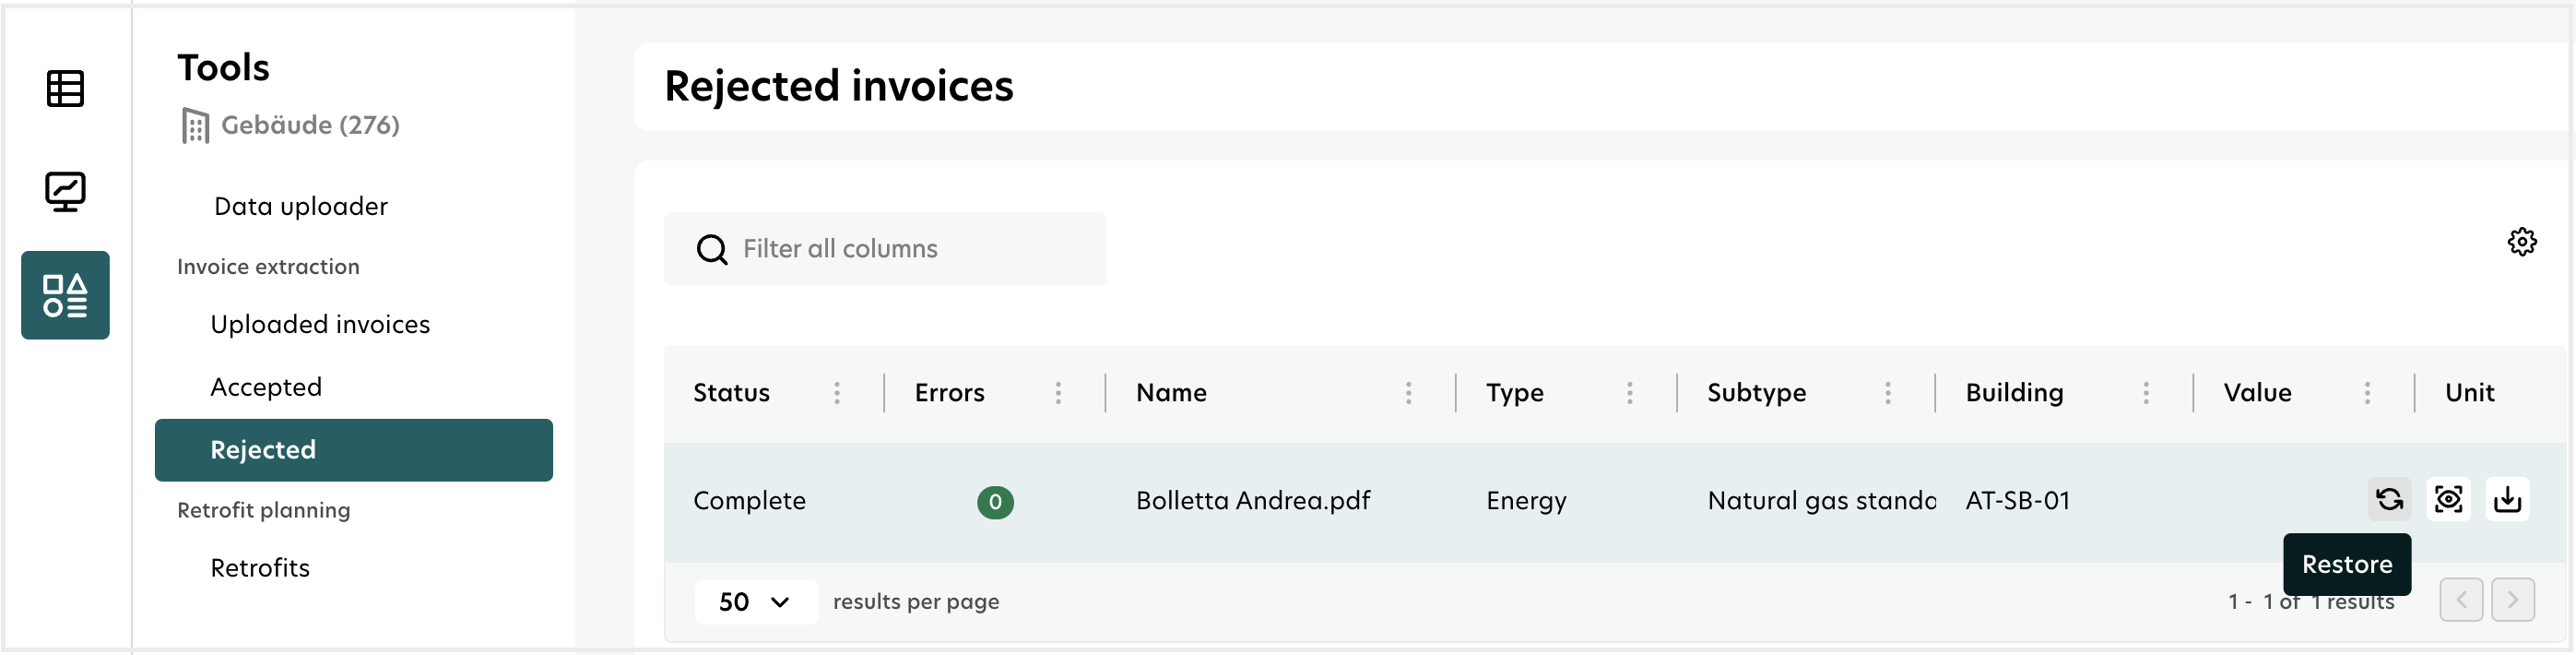
Restore a rejected invoice
Go to the Rejected tab.
Select the invoice you wish to restore.
Click the Restore button, and the invoice will be moved back to the uploaded list.
Approve an invoice
Single invoice approval | Bulk approval |
|---|---|
Go to the Pending invoices list. Hover over the row of the invoice to be approved. Click the Approve icon. Confirm the approval. A success toast notification is displayed. | Go to the Pending invoices list. Select all invoices to be approved. Click the Approve button above the list. Confirm the approval. A success toast notification is displayed. |
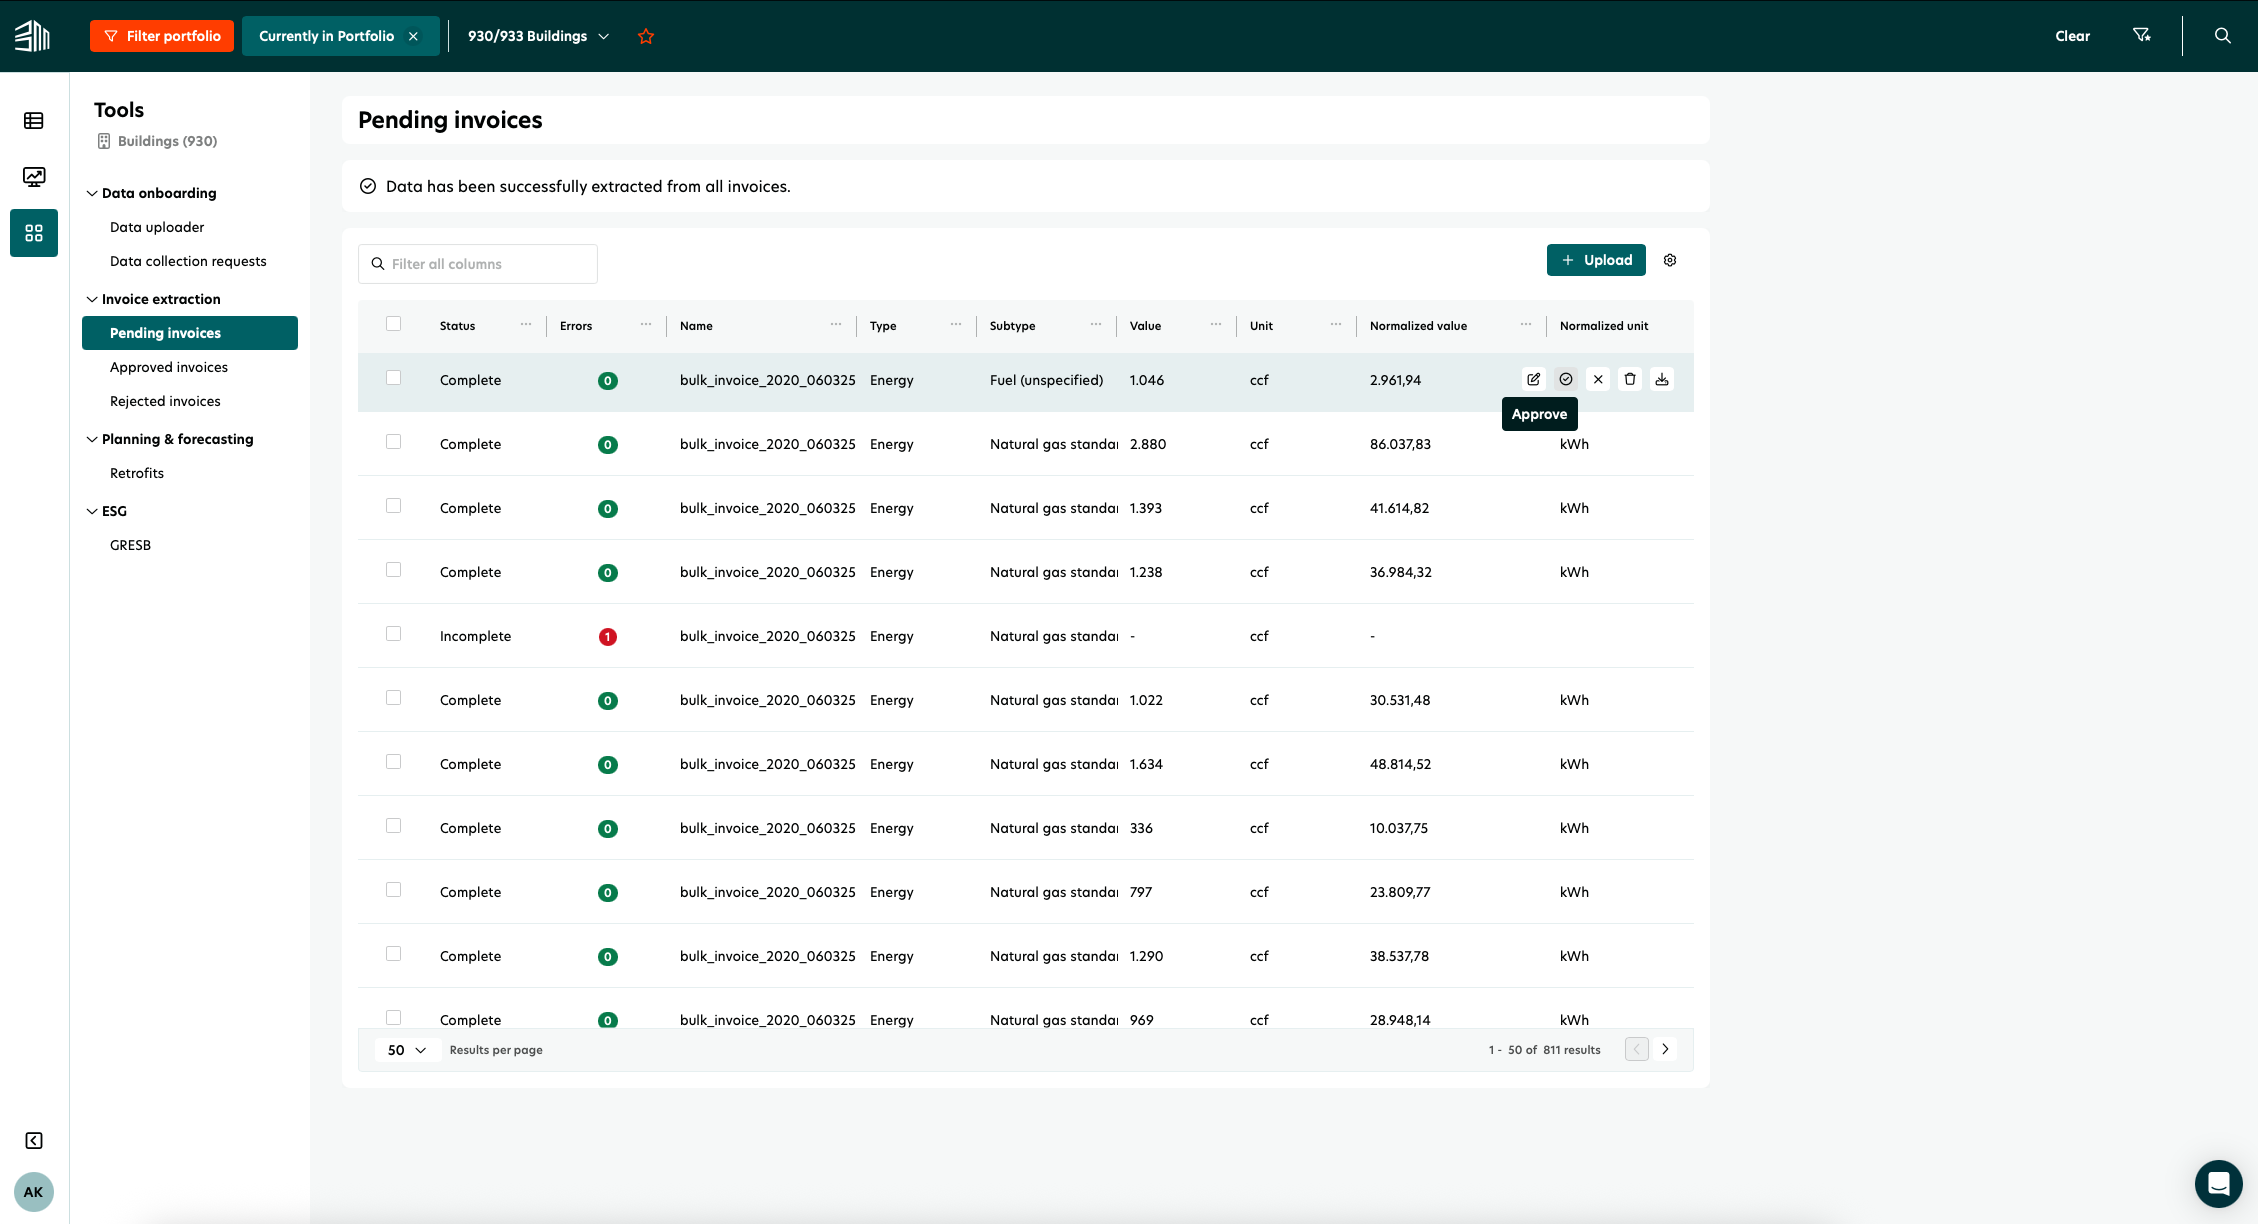
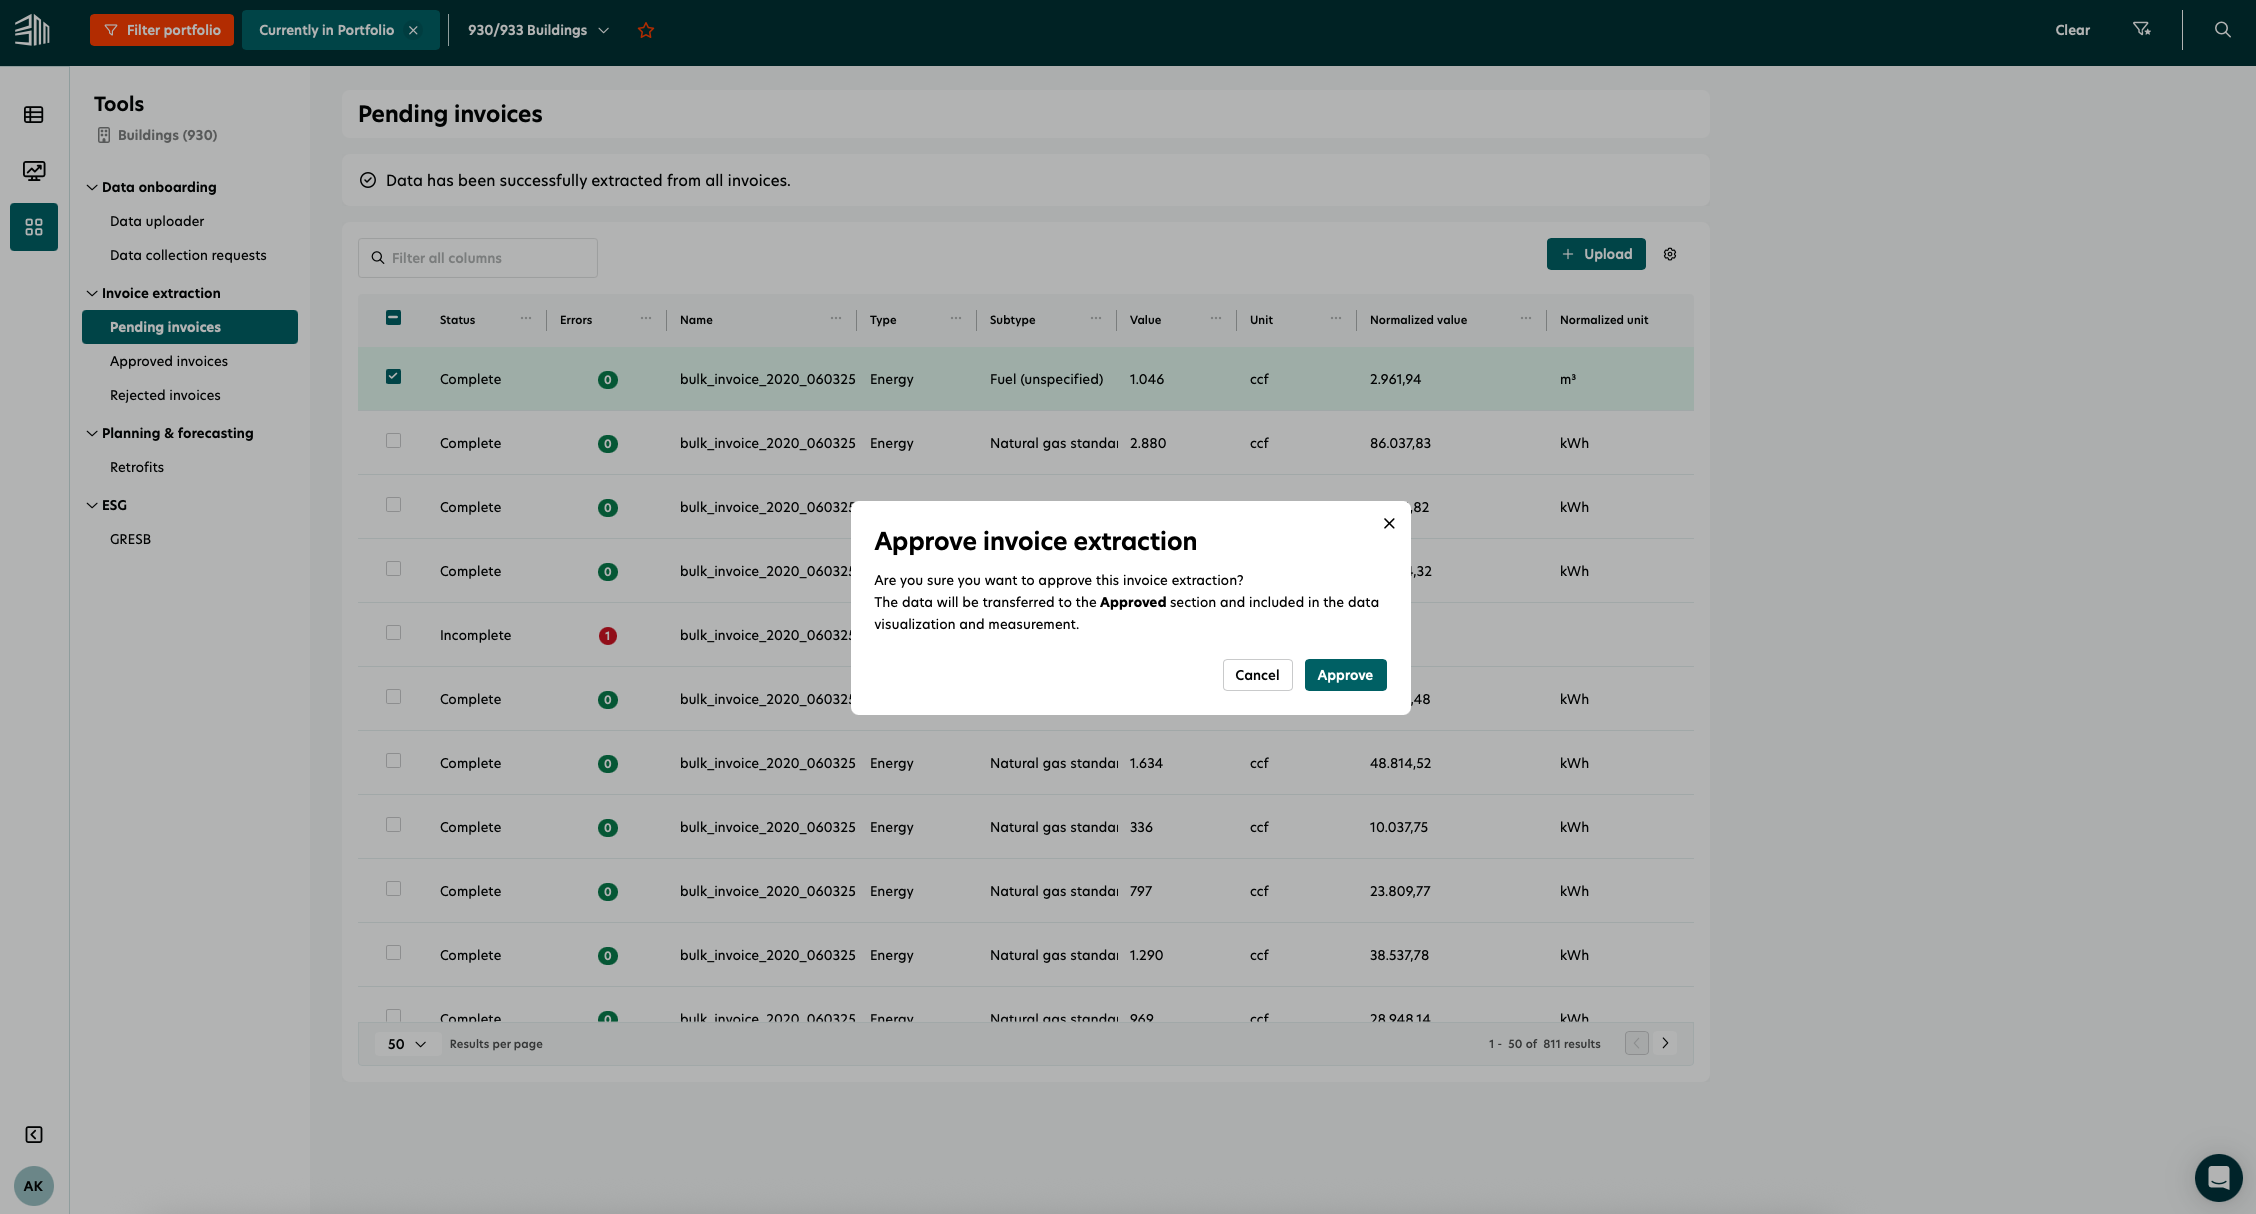
Result of approval
Approved invoices appear under Approved invoices instead of Pending invoices.
The validated consumption data is available in Data management > Operational measurement and used in reports.
Duplicate invoices
When approving an invoice, the system checks if there is already an operational measurement for the same building, utility type, and time period.
If a match exists:
Approval fails.
The invoice status changes to Duplicate.
The user can reject/delete the invoice or edit the data and reapprove it.
Incomplete or invalidated invoices cannot be approved. Required missing data must be completed before approval is possible.
Failed invoice upload
When using the Invoice extractor, users may occasionally encounter upload issues. These could be due to incorrect file formats, missing required fields, or other unexpected errors. In such cases, it’s important to ensure that your data can still be processed without delays.
In the event of a failed invoice upload, users can still manually upload their data via Data Management. For detailed instructions, refer to Manage resource consumption data.
Bulk actions
This feature streamlines invoice management by allowing users to perform bulk actions on multiple invoices at once.
Delete multiple invoices in a single step.
Approve or Reject multiple invoices at the same time.
Restore previously deleted invoices in bulk.
This saves time and simplifies the process of managing large sets of invoices efficiently.
Bulk deletion 1. Go to “Pending invoices” list OR to the “Rejected invoices” list. 2. Select all invoices to be deleted. 3. Click on Delete button at the top right corner. 4. Confirm deletion. Result: the invoices are deleted and not visible anymore. Note: Any pending invoices can be deleted, except Processing ones. | Bulk approve 1. Go the “Pending invoices” list 2. Select all invoices to be approved. 3. Click on Approve button at the top right corner. 4. Confirm approval. Result: the invoices are moved to the Approved invoices list. Note: Only Completed invoices can be approved. | Bulk reject 1. Go to “Pending invoices” list. 2. Select all invoices to be rejected. 3. Click on 4. Confirm rejection. Result: the invoices are moved to the Rejected invoices list. Note: Any pending invoices can be rejected, except Processing ones. | Bulk restore 1. Go to “Rejected invoices” list. 2. Select all invoices to be restored. 3. Click on 4. Confirm restoration. Result: the invoices are moved to the Pending invoices list. Note: Any rejected invoices can be restored. |
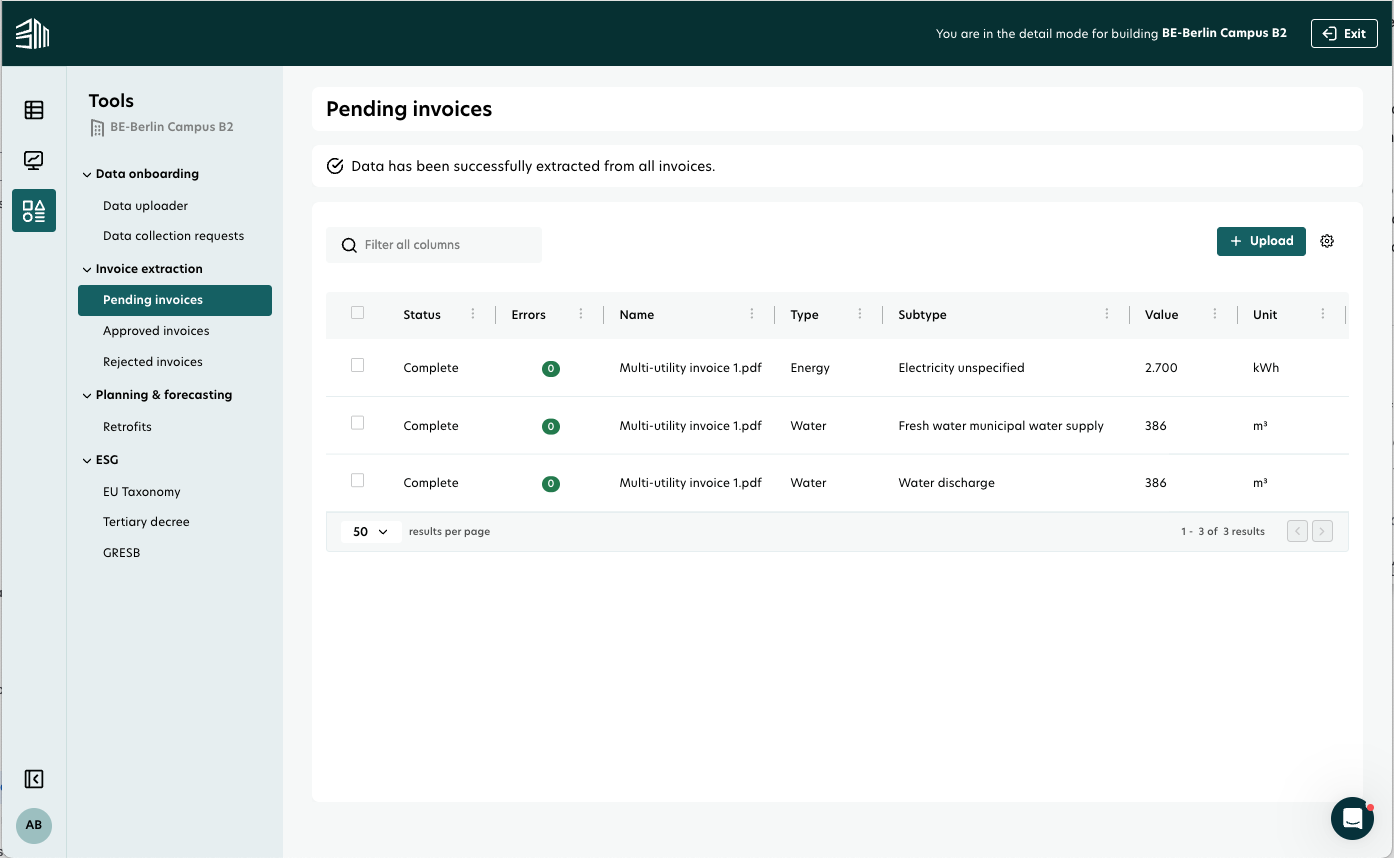
Multi utilities invoices
This feature ensures that invoices containing data for more than one utility type are processed just like any other invoice.
How It Works:
Upload the invoice as you would do with any other invoice. (For detailed steps, refer to the Invoice Upload Instructions above)
Once the invoice is processed, separate rows will be displayed for each utility type included in the invoice.
Most information across these rows will be identical.
However, the consumption data (value and unit), as well as the utility type and sub-type, will differ for each row.
Example:
If users upload an invoice that includes data for Electricity and Gas, the system will display two rows in the Pending Invoices list: One row for Electricity and one row for Gas.
This ensures each utility type is tracked and managed separately for clarity and accuracy.
Multi invoices file
The multi invoices file feature allows users to upload a single file that contains multiple invoices. The system automatically extracts each invoice and utility type, creating separate records for processing.
Uploading a multi-invoice file follows the same steps as uploading a single invoice.
How it works
Upload the file using the standard invoice upload process.
The system reads each invoice and extracts the relevant data.
Each invoice and utility type is displayed as a separate row in the Pending invoices list.
Examples
Example 1
A file contains:
1 invoice for electricity
1 invoice for gas
Result: Two rows appear in the Pending invoices list—one for Electricity and one for Gas.
Example 2
A file contains:
1 combined invoice for electricity and gas
1 invoice for water
Result: Three rows appear in the Pending invoices list—one for Electricity, one for Gas, and one for Water.
Where to find the results
All extracted invoice records are listed in the Pending invoices list, with one row per invoice and utility type.
Metering point extraction and mapping to meters
During data extraction, the metering point ID can be retrieved from the invoice and matched to an existing meter in the BuildingMinds system. If no match is found, a new meter is created so that all invoices and related consumption data are linked to meters.
Metering point ID definition
A metering point ID is a unique identifier used in utility systems to specify the exact location or point within a grid where energy or resource consumption is measured. It is essential for accurate billing, supplier switching, and data management.
The metering point ID is not the same as the meter ID. Both may appear in invoices.
Extraction scenarios
1. Building provided before invoice upload
a. Metering point ID extracted and matched to an existing meter
Result: No action needed.
The edit form will display:
Extracted metering point ID
Mapped meter ID
Expected data frequency of the meter
b. Metering point ID extracted but no match found
Optional action needed:
Open the edit form and provide a meter in Metering point information
Manually enter:
Meter external ID
Expected frequency
Upon approval, a new meter will be created for the building using the provided data
c. Metering point ID not extracted
Optional action needed:
Open the edit form and provide:
Metering point ID
Meter
Option 1: Select a meter from the dropdown list (all existing meters for the selected building and utility type)
Option 2: Switch to Manual and enter:
Meter external ID
Expected frequency
Upon approval, a new meter will be created for the building using the provided data
2. Building not provided before invoice upload
The same scenarios as above apply, with an additional step:
If no building is linked via the metering point ID, the user must also provide the building in the edit form before approval.
Critical points
After extracting the metering point ID, the system checks for existing meters with that ID. If found, the invoice is automatically linked to the meter and its associated building.
An invoice must always be linked to a building before approval.
Feature permissions
The Invoice extractor feature is subject to specific permissions that control user access and actions. These permissions are managed in the Authorization service.
Permission Level | Access Details |
|---|---|
None | Feature not visible in the left menu. |
Read-only | You can view pending invoices. The Upload button is hidden. Approve, Reject, Edit, and Delete buttons are hidden on hover. The Restore button in the rejected invoices list is hidden. |
Read + Edit | You can view pending invoices. The Upload button is hidden. Approve, Reject, and Edit buttons are visible on hover. The Delete button is hidden. The Restore button is visible in the rejected invoices list. |
Read + Edit + Add | You can view pending invoices. The Upload button is visible. Approve, Reject, and Edit buttons are visible on hover. The Delete button is hidden. The Restore button is visible in the rejected invoices list. |
Read + Edit + Add + Delete | Full access. The Upload button is visible. Approve, Reject, Edit, and Delete buttons are visible on hover. The Restore button is visible in the rejected invoices list. |
Video tutorial - Invoice extractor
Here is a video tutorial to walk you through the process of how to use Invoice extractor.